How to make audio louder in Audacity: normalize, compress and limit
To make audio louder in Audacity, select it and choose Effect ▸ Volume and compression ▸ Normalize with the peak set to −1 dB. If it still sounds quiet, the loudest moments are using up the headroom, and the fix is a Compressor followed by a Limiter in the realtime effects panel (press E). For a podcast or a video, finish with Loudness Normalization to the platform’s target, which is measured in LUFS rather than in peak decibels.
This guide covers what Audacity’s five volume effects do and the steps for each, in the order that works. It also gives the loudness targets Apple Podcasts and Spotify publish, the mistakes that turn “louder” into “distorted”, and plugins that go past the built-ins.
Tested on Audacity 4.0.1 on macOS Sequoia; the screenshots are from that install. Shortcuts are written for Windows; macOS uses Cmd where Windows uses Ctrl.
Audacity and dynamics tools on MuseHub



Which effect makes it louder
Amplify, Normalize and Loudness Normalization move the whole selection by one amount, so the first two stop when the loudest peak touches the ceiling. Compressor and Limiter treat loud and quiet moments differently, which lets the average rise while the peaks stay put.
| Effect | What it changes | Destructive or realtime | Reach for it when |
|---|---|---|---|
| Amplify | Adds a fixed gain in dB to the selection; opens at the gain that puts the peak at 0 dB | Destructive (Effect menu) | You know the change you want, such as lifting a quiet guest to match the host |
| Normalize | Sets the highest peak to a target level (default −1 dB); can remove DC offset | Destructive | The first move on any recording, and for matching several clips by peak |
| Loudness Normalization | Sets perceived loudness (LUFS) or RMS to a target | Destructive | The last level change before export, to land on a podcast or streaming target |
| Compressor | Turns down whatever crosses a threshold, then adds make-up gain | Both: Effect menu, or realtime on a track or the Master | The peak is already at −1 dB and the audio still sounds quiet |
| Limiter | Stops peaks at a ceiling (default −1 dB) | Both | The last effect in the chain, to catch peaks and add a few safe decibels |
Destructive effects change the waveform once, and undo reverses them. Realtime effects sit on the track and are applied at export, so you can keep adjusting them. How to use effects in Audacity covers both kinds.
What you need
- Audacity 4. It is free. Get it through MuseHub on Windows and macOS, or from audacityteam.org, which also has a Linux build. Audacity 3 has the same effects, but its menus and panels look different.
- A recording with the noise already dealt with. Compression raises room hiss along with the voice, so run noise reduction first.
Step 1: Normalize the peak to −1 dB
Normalize moves the whole selection so its loudest sample lands on the level you choose. It cannot clip, because the peak goes exactly where you send it.
- Open the effect. Press Ctrl+A to select everything, then choose Effect ▸ Volume and compression ▸ Normalize.
- Keep Remove DC offset on. It centers a waveform that sits above or below zero, which wastes headroom and can click at clip edges.
- Keep the peak at −1 dB. That is the default. The margin is for MP3 and AAC encoding, which can push peaks past the original sample values.
- Leave Normalize stereo channels independently off. Otherwise the stereo balance shifts whenever one channel peaks higher than the other.
- Apply and listen.

If the waveform now peaks at −1 dB and still sounds quiet, the loudest moment sits far above the average. Normalize and Amplify cannot close that gap; the compressor in Step 3 can.
Step 2: Amplify when you know the number
Amplify applies one gain change, in decibels. It opens at the value that brings the peak to exactly 0 dB, so left untouched it behaves like Normalize to 0 dB. Use it when you know the number, such as a guest who came in a few decibels under the host.
- Open the effect. Select the part to change and choose Effect ▸ Volume and compression ▸ Amplify.
- Type the change. Enter it in Amplification (dB); New peak amplitude (dB) shows where the peak will land.
- Keep Allow clipping off. With it on, peaks above 0 dB are cut flat, which crackles on every loud syllable.
- Apply.
With Allow clipping off, Apply and Preview turn grey for any setting that would push the peak past 0 dB. In the screenshot, +8 dB would put the peak at +1.38 dB.

Step 3: Compress to raise the quiet parts
A compressor turns down whatever crosses its threshold, then make-up gain lifts everything back up, so the quiet words end up louder. What is audio compression explains the mechanism, and how to use a compressor walks through the controls.
- Open the realtime panel. Click the track, then press E or click its Effects button.
- Add the Compressor. Click Add effect and choose Compressor from the Audacity group, then press play.
- Start from the defaults. Threshold −12 dB, ratio 4:1, knee 6 dB, make-up gain 9 dB, attack 3 ms, release 100 ms, lookahead 3 ms. At that threshold and ratio, 9 dB of make-up puts the peaks back where they went in.
- Lower the threshold while it plays. Stop when the Compression meter shows a few decibels on the loud words and nothing in the pauses. For speech that is usually in the −20s.
- Match the levels and compare. Set the make-up gain so the Output meter matches the Input on the loud parts, then toggle the power button. Louder always sounds better at first, so compare only at matched levels.
The Default preset dropdown at the top of the effect holds factory presets, a quicker start when one matches your material.

Listen for pumping, where the level swells after every word because the release is too short. A meter that never returns to zero means the threshold is too low.
Step 4: Limit on the Master
A limiter is a compressor with a ratio so high that nothing gets past its ceiling; what is a limiter covers what that costs. In Audacity 4 it belongs in the Master section of the realtime effects panel, which processes the whole mix after each track’s own effects, in playback and in the export.
- Add the Limiter. Scroll to the Master section at the bottom of the panel, click its Add effect button and choose Limiter.
- Check the defaults. Threshold −6 dB, output −1 dB, knee 2 dB, lookahead 1 ms, release 20 ms. Output is the ceiling, with the same encoding margin as Step 1.
- Lower the threshold to add level. Each decibel off the threshold raises everything below it by a decibel while the ceiling stays fixed. A few decibels of reduction on the loudest hits is inaudible; constant reduction flattens the sound.

The Limiter goes last because it catches the peaks everything before it produces. Above the Compressor, the make-up gain would push peaks back over its ceiling.
Step 5: Loudness Normalization for the destination
LUFS (Loudness Units relative to Full Scale) measure how loud audio sounds over its whole length, weighted for hearing, rather than how high its peaks reach. Platforms measure your file this way and turn it down to their target if it is louder, so landing near it keeps your episode level with the one before.
- Select everything. The effect judges the whole selection as one, so takes recorded on different days come out matched.
- Open the effect. Choose Effect ▸ Volume and compression ▸ Loudness Normalization and set Normalize to Perceived loudness. RMS is an older measure that platforms do not use.
- Type the target. The default, −23 LUFS, is the broadcast standard, quieter than the online targets below.
- Leave Treat mono as dual mono on. On a mono voice track, the reading then accounts for the track playing through both speakers.
- Apply.

| Destination | Integrated loudness | True peak | Source |
|---|---|---|---|
| Apple Podcasts | −16 LKFS, ±1 dB | no higher than −1 dB FS | Apple Podcasts for Creators, “Audio requirements” page |
| Spotify (music catalog) | −14 LUFS | below −1 dB TP | Spotify for Artists, “Loudness normalization on Spotify” page; listeners can also pick Loud (−11) or Quiet (−19) |
| Spotify (podcasts) | no loudness figure in the podcast specification | none stated | Spotify Podcast Delivery Specification v1.10, which asks for MP3 at 128 kbps or more, or MP4 with AAC-LC |
| YouTube | no published figure; playback measured at about −14 LUFS | keep −1 dB TP | Measured by users from the player’s “Stats for nerds” content-loudness line, so treat −14 LUFS as a guide |
| Apple Music | no published figure; Sound Check measured at about −16 LUFS | at least 1 dB of headroom | Apple Digital Masters documentation, which names Sound Check and the headroom but no LUFS value |
LKFS and LUFS are the same unit under two names. A file at −16 LUFS meets Apple’s figure, and Spotify’s podcast specification sets no loudness, so the same file passes there too. A platform that turns −16 down a little loses nothing; one that turns −23 up raises your noise floor with it.
Compress before you measure loudness, because compression changes it. First remove the realtime Compressor you added in Step 3: realtime effects run again at export, so it would compress the file after Loudness Normalization and push it past the target. This chain applies the compressor from the Effect menu instead. For a podcast, run it in this order:
- Compressor from the Effect menu. It writes the compression into the waveform, so Loudness Normalization measures the compressed sound.
- Loudness Normalization to −16 LUFS.
- Limiter in the Master section, threshold and output both at −1 dB. With the threshold at the ceiling it adds no level and only catches stray peaks, so the loudness stays where you set it.
- Export.
Export without undoing the work
Choose File ▸ Export audio… (Ctrl+Shift+E), then Export to computer. Export a WAV master copy first, then the MP3. For a mono voice, set Format to MP3 Files, Bit Rate Mode to Constant and Quality to 128 kbps, which sits inside Apple’s 96–128 kbps range for mono and meets Spotify’s minimum. For stereo Apple asks for 128–256 kbps, at 44.1 or 48 kHz. Realtime effects are included in the export.
Common mistakes
- Turning on Allow clipping. Amplify then flattens every peak above 0 dB, and the result crackles on each loud word.
- Normalizing to 0 dB before an MP3 export. The encoder reconstructs peaks slightly above the sample values, so a file that touched 0 dB can clip on playback. That is why Apple and Spotify ask for 1 dB of true-peak headroom.
- Compressing the noise floor. Make-up gain lifts the hiss in the pauses along with the voice. Run noise reduction first, or put a Noise gate from the Effect menu before the compressor.
- Chasing the LUFS number with Amplify. Gain raises loudness and peaks together, and once the peaks hit the ceiling you are stuck. A compressor narrows the gap between them so the loudness can rise.
- Pushing the track’s volume slider. The slider in the track panel is part of the mix, so it is applied on export too. Raised above 0 dB on a normalized track, it clips the exported file even though the waveform looks safe. Leave it at 0 dB and do the gain with the effects.
Pro tips
- Mix with realtime effects, finish with destructive ones. Keep the Compressor realtime while you edit so you can change it. Once the edit is locked, remove it and apply the same settings from the Effect menu.
- Raise an album as one piece. Select all the songs and use Amplify with New peak amplitude at −1 dB. It applies the same gain to every track, so the quiet ballad stays quieter than the loud single, as it was mixed. Normalize works out each track on its own and levels the peaks.
- One loud laugh does not need a compressor. Use the Clip gain button in the toolbar to draw a volume envelope that dips that moment by a few decibels, then normalize.
Example settings
- Podcast voice for Apple Podcasts and Spotify. Normalize to −1 dB. Compressor from the Effect menu, threshold around −24 dB, ratio 4:1, attack 3 ms, release 100 ms, make-up gain until the loud words sit where they were. Loudness Normalization to −16 LUFS, Treat mono as dual mono on. Limiter on the Master at −1 dB threshold and output. Export WAV, then MP3.
- A finished stereo mix for streaming. Normalize to −1 dB. Compressor from the Effect menu, ratio 2:1, attack 20–30 ms so the drums keep their hit, threshold set for 1–2 dB of reduction on the loudest bars. Loudness Normalization to −14 LUFS. Limiter on the Master at −1 dB threshold and output.
These are starting points. Move the threshold until the meter shows a few decibels on the loud parts, and stop there.
Plugins that go past the built-ins
For a podcast, Audacity’s Compressor and Limiter are enough. The plugins below add character, tape-style peak rounding and control over the attack of a sound. They install through MuseHub and appear under Add effect once Audacity validates them on the next start.

Puncher 2 Lite by W.A. Production combines transient shaping with compression, so you can push the initial hit of a drum forward while controlling the sustain behind it. The built-in Compressor reacts only to level and cannot make that move.

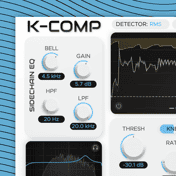
KrystalComp by Krystal Dynamics is a precise digital compressor that adds no coloring and shows more of what the gain reduction is doing than the built-in effect. It suits a background vocal that drifts.

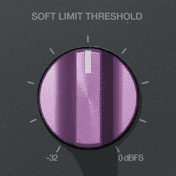
Soft Limit by Apogee is a tape-style limiter. Tape rounds off peaks gradually and adds harmonic density as you push into it, so the sound gets louder and slightly warmer as well as flatter. Run a mix lightly through it before Audacity’s Limiter sets the final ceiling.

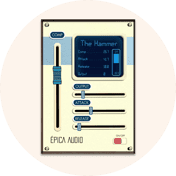
The Hammer II by Épica Audio models FET compressors, the transistor-based studio units known for a fast, aggressive grab. It runs with zero latency, so a singer can record through it with no delay. It suits drums and parts that have to push forward in a mix, a music job more than a podcast one.
MuseFX, Muse Group’s free effects collection, includes a compressor listed as Compress under Add effect. The full field is in the best compressor plugins and the best limiter plugins, and the rest is in plugins on MuseHub.
FAQ
Next steps
Clean the noise first: every method here lifts it along with the voice, and noise reduction in Audacity shows how to take it out. How to edit a podcast in Audacity puts loudness in order with the cut, the noise pass and the export. Get Audacity and the plugins in one place — download MuseHub free.