How to use a compressor: settings that actually work
To use a compressor, set the ratio between 2:1 and 5:1, lower the threshold until the gain-reduction meter shows a few decibels on the loudest parts, then use a fast attack to tame peaks or a slower one to keep the punch — and match the output with makeup gain so you can compare fairly against the uncompressed sound.
That is the method in one paragraph. The rest of this guide is about what each control is doing to the sound, because presets copied from an article rarely survive contact with your actual recording.
If you want the concept rather than the controls, what is audio compression covers what compression is and why it exists.
Compressors to practice on

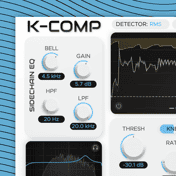

The five controls at a glance:
- Threshold: the level where compression starts. Lower means more.
- Ratio: how firmly it holds back what crosses the threshold.
- Attack: how fast it reacts. Fast tames transients, slow keeps punch.
- Release: how fast it lets go. Too fast distorts, too slow pumps.
- Makeup gain: puts back the level you removed, so you can judge honestly.
How we choose: we give ranges and explain what to listen for rather than inventing exact presets, and we state the price of anything we name.
The five controls
Threshold
The level at which the compressor engages. Signal above it gets turned down; signal below it passes untouched.
Lower the threshold and more of the performance is affected, because more of it crosses the line. Raise it and only the loudest moments are caught.
The thing to internalise: threshold is not a “how much compression” control on its own. It decides how often the compressor works. How hard it works when it does is the ratio’s job. The two are always set together, which is why chasing one without watching the other is frustrating.
Ratio
How much of the signal above the threshold is held back, written as a ratio. At 4:1, a signal arriving 4 dB above the threshold leaves 1 dB above it.
Start between 2:1 and 5:1. That range covers most everyday work: gentle levelling at the bottom of it, obvious control at the top. Higher ratios — 10:1 and beyond — stop being about shaping and start being about clamping, which is the territory where a compressor becomes a limiter.
Low ratio with a low threshold gives you gentle compression applied to most of the performance. High ratio with a high threshold gives you firm control of a few peaks only. Those two produce very different results while showing similar amounts of gain reduction, which is why the meter alone never tells the whole story.
Attack
How quickly the compressor responds once the signal crosses the threshold.
A short attack means it clamps down almost instantly, catching the transient — the initial spike at the start of a sound. That evens things out, and it also removes the snap: a snare with a very fast attack sounds controlled but less exciting.
A longer attack lets that initial transient through before the compression takes hold, preserving the punch while still controlling the body of the note. This is why “slower attack for more punch” is the most repeated piece of compression advice, and it is genuinely true — but only up to the point where so much passes through that you are no longer controlling anything.
Start medium-fast and move in both directions while listening to the attack of the sound, not its level.
Release
How quickly the compressor stops attenuating once the signal falls back below the threshold.
Fast release returns to normal quickly, which keeps energy and density but can produce distortion on low-frequency material — the gain is moving fast enough to interact with the waveform itself.
Slow release smooths things gradually. Too slow and the compressor never recovers between notes, so it holds the whole part down and the track feels like it is ducking.
Start medium. A useful trick is to set the release so the gain reduction breathes roughly in time with the music: on a rhythmic part, the needle should return most of the way back before the next hit lands.
Makeup gain
Compression reduces level, so the compressed version is quieter. Makeup gain adds it back.
This exists for a practical reason beyond housekeeping: louder always sounds better in a quick comparison. If you A/B a compressed and uncompressed signal at different levels, the louder one wins regardless of which is actually better. Setting makeup gain so both are equally loud is the only way to tell whether the compression is helping.
And knee, briefly
Knee controls how abruptly compression starts around the threshold. A hard knee applies the full ratio the moment the threshold is crossed. A soft knee eases in over a range, which sounds gentler and is usually the better default for vocals and anything acoustic.
The method: work from the gain-reduction meter
Explaining knobs one at a time is how compression is usually taught, and it is not how compression is used. Here is an order that works.
- Set the ratio first, roughly. Somewhere in the 2:1 to 4:1 range for general work. You are choosing intensity before anything else.
- Set attack and release to medium. You will refine them, but you cannot judge them until compression is happening.
- Lower the threshold until the meter moves. Watch the gain-reduction display and aim for a few decibels on the loudest parts. Not “as much as it takes to hear a difference” — a few decibels.
- Set makeup gain to match the bypassed level. Do this now, before you make any judgements.
- Now shape with attack. Faster to control the transient, slower to let it through. Listen to the front of each sound.
- Then release. Aim for the meter recovering between hits, without hearing the recovery.
- Bypass and compare, repeatedly. At matched level. This is the only step that tells you whether any of it helped.
The most common beginner mistake is doing this in the wrong order — setting an aggressive threshold first, then trying to fix the resulting damage with attack and release.
Starting points by source
Ranges, not presets. Your recording, your compressor and your taste all shift these, and any article claiming exact numbers for your material is guessing.
| Source | Ratio | Attack | Release | Listen for |
|---|---|---|---|---|
| Lead vocal | 2:1–4:1 | Medium | Medium | Consistent level without the breaths jumping forward |
| Snare / drums | 4:1–8:1 | Slow enough to keep the crack | Fast, recovering between hits | Punch kept, body controlled |
| Bass | 3:1–6:1 | Medium-fast | Medium-slow | Even notes across the neck, no distortion |
| Acoustic guitar | 2:1–4:1 | Medium | Medium | Strums even, pick attack intact |
| Mix bus | 1.5:1–2:1 | Slow | Slow, or auto | Glue only — 1–2 dB of reduction |
Note how gentle the mix-bus row is. Compression on individual tracks shapes them; compression across a whole mix is a light touch, and heavy-handed bus compression is one of the fastest ways to make a mix worse.
When there is too much
It sounds squashed and lifeless. Too much gain reduction, or too fast an attack. The transients have gone; the track is loud and flat.
It pumps and breathes. You can hear the compressor recovering after each loud moment. Lengthen the release, or reduce the amount of reduction.
It distorts on the low end. Release too fast for the frequencies involved. Slow it down.
Everything sounds louder but nothing sounds better. Almost always an unmatched A/B. Set makeup gain properly and listen again — this accounts for more bad compression than any setting.
Where a compressor sits
EQ before or after? Both are defensible. EQ before the compressor means the compressor reacts to the corrected sound, so cutting a boomy low end first stops that boom triggering gain reduction. EQ after means you are shaping the finished, compressed tone. A common approach is corrective EQ first, compression, then tonal EQ afterwards.
Parallel compression blends a heavily compressed copy under the original. You get density and sustain from the compressed signal while the untouched original keeps its transients — a way to have both, and standard on drums and vocals.
Compression and limiting are the same mechanism at different intensities. See what is a limiter for where one ends and the other begins.
Compressor plugins worth knowing
Several strong options are free, prices as they stand:

Puncher 2 Lite by W.A. Production — free.

KrystalComp — free.

OPT4 by NIVIEM — free, an optical-style leveller, the gentler flavour that suits vocals.
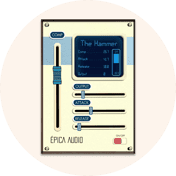
Paid options include The Hammer II (€39.99) and Polyspectral MBC (€49.99) for multiband work. The full field is in the best compressor plugins.
FAQ
How much gain reduction should I use? A few decibels on the loudest parts is a sane default for most sources. Mix-bus compression wants less — one or two.
Do I need a compressor on every track? No. Plenty of well-recorded parts need none. Compress when a part’s level is inconsistent enough to be distracting, or when you want the specific character compression adds.
Compressor before or after EQ? Corrective EQ first so the compressor isn’t triggered by problems you are about to remove; tonal EQ after.
Why does my compressed track sound worse but louder? Because you compared at different levels. Match with makeup gain and A/B again.
What is the difference between a compressor and a limiter? Ratio. A limiter uses a near-infinite one, so nothing passes its ceiling. See what is a limiter.
Are free compressors good enough? Yes. Several of the picks above are free and entirely capable of professional results — compression is old, well-understood processing.
Next steps
Compression is one of the core mixing moves. What is audio compression covers the concept behind these controls, principles of equalization covers its usual partner, and how to mix music yourself puts both in the context of a whole mix.
When you get to the master, what is mastering explains what that stage is for and how to master a song covers compression there, where the settings are far gentler.
Get these compressors and the rest in one place — download MuseHub free.