How to record computer audio in Audacity
To record computer audio in Audacity on Windows, click Audio setup, set the host to Windows WASAPI, choose your output device marked (loopback) as the recording device, start the audio playing, and press R. macOS has no built-in route, so you install the free BlackHole driver, make a Multi-Output Device in Audio MIDI Setup, and record from BlackHole 2ch.
This guide covers the Windows loopback route in full, the macOS route with BlackHole, Linux in brief, the settings that stop silent or echoing takes, and how to clean the capture afterwards.
Tested on Audacity 4.0.1 on Windows 11 and macOS Sequoia; the screenshots are from those installs.
Audacity and voice cleanup plugins


What you need
- Audacity 4 — free, for Windows, macOS and Linux, from the Apps section of MuseHub or from audacityteam.org. The steps use the 4.0 window; where Audacity 3 differs, there is a short note.
- The audio you want to capture, ready to play — a browser tab, a call, a game, a streaming app.
- On macOS only: BlackHole, a free virtual audio driver, because macOS ships no way to record its own output.
- Headphones help but are optional, as long as input monitoring stays off.
Audacity records from a microphone by default. Desktop capture asks it to treat your output as an input, which Windows allows through a feature called loopback: the sound card offers a copy of everything it plays as a recording device. macOS has no such copy, and Linux exposes one through its sound server, which is why the three routes look so different.
| Platform | Host | Recording device | The usual failure |
|---|---|---|---|
| Windows 10 / 11 | Windows WASAPI | your output, marked (loopback) | nothing was playing when you pressed record |
| macOS | Core Audio | BlackHole 2ch | no Multi-Output Device, so you hear nothing |
| Linux (PulseAudio) | ALSA | pulse, then Monitor in pavucontrol | the capture source is still the mic |
The official reference for all three is the Audacity support page on recording desktop audio. This guide adds the checks, the settings and the cleanup that page leaves to you.

Windows: WASAPI loopback
WASAPI (Windows Audio Session API) is the modern way Windows apps talk to the sound card, and its loopback device hands Audacity the digital stream going to your speakers, so the copy is exact.
- Open Audio setup. Click the Audio setup button in the middle of the top bar.
- Set the host to Windows WASAPI. Open Host and choose Windows WASAPI. The other hosts in the list, MME, Windows DirectSound and ASIO, offer no loopback devices.
- Pick the loopback device. Under Recording device, skip the System default entry at the top and choose the output you are listening on; it appears with (loopback) after its name, for example Speakers (2- Realtek(R) Audio) (loopback). If sound is going to your headphones, the speakers’ loopback records silence.
- Set Recording channels to 2 (Stereo) in the same menu. WASAPI loopback cannot record mono on some devices, and the symptom is a flat line rather than an error.
- Start the audio playing, then record. Press R (Record on current track) or choose Record ▸ Record on new track. WASAPI can record a silent stream but not a missing one, so press play in the source first.
Press Stop when the audio ends. On Audacity 3 the same choices sit in the Device toolbar, and the (loopback) device is named the same way.

With WASAPI set, the Recording device list shows the loopback entries alongside the microphones.

macOS: BlackHole and a Multi-Output Device
macOS gives apps no loopback device, and Audacity cannot add one. Soundflower, the driver older guides recommend, does not run on Apple Silicon Macs. The free replacement is BlackHole, and the trick is to send the system output to BlackHole and your speakers at the same time, so you can hear while you record.
- Install BlackHole (the 2ch build is enough) from the developer’s site. Restart Audacity if it was open, so it sees the new device.
- Open Audio MIDI Setup from Applications ▸ Utilities.
- Create a Multi-Output Device. Click + at the bottom left and choose Create Multi-Output Device. Tick your real output (the built-in speakers or your headphones) first, then BlackHole 2ch. Audio MIDI Setup ticks Drift Correction for BlackHole by default; leave it on.
- Make it the system output in System Settings ▸ Sound ▸ Output. The keyboard volume keys stop working while a Multi-Output Device is selected, so set the volume inside the app you are recording.
- Point Audacity at BlackHole. Click Audio setup, choose BlackHole 2ch under Recording device, and set Recording channels to 2 (Stereo). If BlackHole is missing, choose Rescan audio devices, just above Audio settings in the same menu.
- Allow microphone access if asked, then record. The first time Audacity records, macOS may ask whether it can use the microphone. Virtual inputs such as BlackHole count, so say yes (System Settings ▸ Privacy & Security ▸ Microphone if you missed the prompt). Start the audio, then press R.
When you are done, switch the output back to your speakers, or every app keeps playing through the Multi-Output Device.

Back in Audacity, BlackHole 2ch now appears in the Recording device list like any other input.

Linux: PulseAudio and PipeWire
On a PulseAudio desktop (Ubuntu, Linux Mint and most others) the sound server already exposes a monitor of every output, and you pick it from outside Audacity.
- Install PulseAudio Volume Control (
pavucontrol) from your package manager. - In Audacity, click Audio setup, set the host to ALSA and the recording device to pulse. Start the audio, then press R.
- In pavucontrol’s Recording tab, find the Audacity entry and set Capture from to the Monitor of your playback device. The waveform starts moving as soon as you switch it.
On a PipeWire desktop, do not install PulseAudio on top. Install pipewire-pulse (Debian, Ubuntu) or pipewire-pulseaudio (Fedora) and choose the pipewire recording device (per the forum’s PipeWire thread). MuseHub runs on Windows and macOS, so on Linux, Audacity comes from your distribution or audacityteam.org.
Record your mic and the computer at the same time
Audacity records from one device at a time, so one take cannot hold both the microphone and the loopback (forum answer). For commentary over a game or a video, record the desktop first, then your voice with Record ▸ Record on new track. For a live call, four setups work.
- Each side records itself. You record your mic in Audacity and the guest records theirs, or the call app saves a file per participant (Zoom can); line the tracks up afterwards.
- A virtual mixer on Windows. Voicemeeter mixes the mic and Windows audio, and Audacity records its output. Quit it afterwards, because an app holding the device exclusively is a known cause of error -9996.
- An Aggregate Device on macOS. In Audio MIDI Setup, click + and choose Create Aggregate Device, tick the microphone first and BlackHole 2ch second, turn on Drift Correction for BlackHole, and set both to the same sample rate. Keep the Multi-Output Device as the system output, because it is what carries the call into BlackHole and to your ears, and choose the Aggregate Device as the recording device in Audacity. It keeps the sources on separate channels rather than mixing them, so set Recording channels to the highest number Audacity offers for it (BlackHole’s guide).
- A hardware mixer or a podcast interface with mix-minus, fed by both the mic and the computer.
Ask everyone on the call for consent before you record.
Common mistakes
- The recording is a flat line. On Windows, the source was not playing, the wrong output’s loopback is selected, or channels are set to mono. On macOS, the Multi-Output Device is not the system output, or Audacity has no microphone permission.
- A delayed echo or a rising howl. Input monitoring is on, so Audacity plays the captured stream back into the output it is capturing. Click the microphone button in the toolbar (its tooltip reads Record level) to open Microphone level and switch off Turn on input monitoring (hear yourself while recording). On Audacity 3 the switch is Transport ▸ Transport Options ▸ Software Playthrough.
- Notification pings are in the take. Desktop capture records everything the system plays, including Audacity’s own playback. Turn on Do Not Disturb or Focus, close what you are not recording, and do not press play in Audacity while recording.
- There is no Stereo Mix. Stereo Mix, Wave Out and What U Hear are the old sound-card route, and most current laptops hide it or ship without it. You do not need it, because WASAPI loopback works on any Windows sound device. If you want it anyway, the Windows Sound control panel’s Recording tab has Show disabled devices in its right-click menu.
- No (loopback) device appears. The host is still MME, Windows DirectSound or ASIO. Switch it to Windows WASAPI and the list changes.
- Windows lists the device but records nothing. Open Settings ▸ Privacy & security ▸ Microphone and allow desktop apps to access the microphone; Windows treats the loopback as a microphone for privacy purposes. Still silent? Check the recording level is not at zero (the Microphone level flyout; in Audacity 3, the slider under the meters) and turn off Windows audio enhancements for the device.
- The take is your microphone, not the computer. After an update, check that Recording device still has the (loopback) entry ticked. A forum report of Audacity 4 doing this could not be reproduced.
Habits that make the capture cleaner
- Mute what you are not recording. Mute the other tabs and apps; turning down the Windows system volume does not lower the loopback level, so it keeps nothing out of the take. On recent Windows 11 builds the source app’s volume in the Windows volume mixer can change the loopback level, so raise it there if a take is quiet.
- Expect the stream’s quality, not more. A compressed stream stays compressed in a WAV export; on YouTube, Stats for nerds shows the codec.
- Leave a second of silence at the start. Start recording a beat before you start the source. That empty second gives Noise reduction a noise profile later, and the clip’s trim handle removes it in one drag.
Example settings
Loopback carries the source’s level unchanged, so most of the setup is choosing the right numbers once.
| Setting | Where | Value | Why |
|---|---|---|---|
| Host | Audio setup | Windows WASAPI · Core Audio · ALSA | only these expose a loopback or monitor |
| Recording channels | Audio setup | 2 (Stereo) | mono loopback fails silently on some Windows devices |
| Default sample rate | Preferences ▸ Audio settings | 48,000 Hz, matching the device rate | a mismatch produces clicks, drift, or a silent WASAPI take |
| Peak level | per-track meter | around −6 dB, never touching 0 | clipping in a digital capture cannot be undone |
| Input monitoring | Microphone level flyout | off | on means a feedback loop |
On Windows the device rate is under Settings ▸ System ▸ Sound, in the output’s format; on macOS it is shown next to the device in Audio MIDI Setup. The default sample rate applies only to tracks created after you change it; recording into an existing track uses that track’s own rate, so set it before you create the track you record into. If the per-track meter touches the top while recording, lower the volume inside the source app.
Clean up the capture
A loopback take has no room noise, but the source often does: a call carries the other person’s fan, a stream carries compression artefacts, a game mix is loud in the wrong places. Audacity’s built-in effects go first; a voice plugin from MuseHub goes further when the take is speech.
Built-in first. Select the whole track (Ctrl+A on Windows, ⌘A on a Mac). For a steady hiss or hum, Effect ▸ Noise removal and repair ▸ Noise reduction learns the noise from a silent stretch and subtracts it; noise reduction in Audacity walks through the profile and the sliders. Two effects under Effect ▸ Volume and compression fix a take that peaks too low. Normalize raises the track to a set peak, and Loudness Normalization sets an average loudness, which is what podcast platforms measure.
Then the plugin, for speech. The built-in effect needs a clean noise sample and treats every recording the same way. A voice-trained denoiser has already learned what speech looks like, so it separates the voice from what is behind it without a profile, and it runs as a realtime effect you can keep adjusting. Press E on the track, click Add effect and pick the plugin; how to use effects in Audacity covers installing plugins through MuseHub.

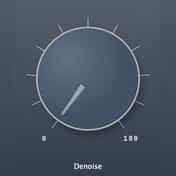
Viator Voice Denoiser by Viator DSP is free and has one control: turn it up until the hiss and room tone drop away, and stop before the voice starts to thin. It suits a recorded call or interview where the far end was noisy. Audacity lists it as voice-denoiser, under VST3 ▸ Viator DSP in Add effect (and AudioUnit ▸ Viator DSP on a Mac) and in the track’s effect stack.

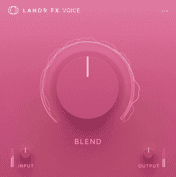
LANDR FX Voice is the paid step up. A preset picks a whole effects chain for the voice and a single intensity knob sets how much of it you get, so a spoken take gets level, tone and cleanup in one pass.

Soap Voice Cleaner is built for spoken word. It removes background noise, tames room reverb and evens out the tone in one pass, with presets for common microphones, so it is the one to reach for when a denoiser alone leaves the echo of the far end’s room behind.
For the AI route, the free OpenVINO AI Tools plugin includes a Noise Suppression effect, but it runs in Audacity 3 only for now; the noise reduction guide linked above covers it.

FAQ
Next steps
With the capture in, editing a podcast in Audacity takes it through cutting, levelling and export, and mixing your podcast covers what a spoken voice needs to sound consistent. Audacity is on MuseHub at Audacity, next to the voice plugins above — download MuseHub free.