Audacity has no built-in autotune. The Audacity 4 effect list contains no pitch-correction effect. Its one built-in pitch tool, Change Pitch, moves a whole selection up or down by a fixed amount instead of pulling each note to the nearest one in key. To autotune vocals in Audacity 4, add a pitch-correction plugin as a realtime effect on the vocal track. The free edition of Graillon 3 installs from MuseHub, loads as VST3 (or Audio Unit on macOS), and is printed into the file when you export.
This guide covers what Change Pitch can and cannot do, installing Graillon 3 through MuseHub and adding it as a realtime effect, setting the key, the settings for a correction nobody hears and for the hard-tuned effect, exporting, which other free tuners still load in Audacity 4, and the mistakes that make a tuner sound wrong.
Tested on Audacity 4.0.1 on macOS Sequoia; the screenshots are from that build. Where Audacity 3 differs, a short note says so.
Pitch correction for Audacity



What you need
- Audacity 4 — free, for Windows, macOS and Linux. It loads VST3 plugins everywhere, Audio Unit plugins on macOS and LV2 plugins on Linux. The VST2 plugins Audacity 3 loaded do not work in it, which rules out one tuner every older guide recommends (see below).
- The MuseHub app — free, with a free account, for Windows and macOS. It installs plugins into the folders Audacity scans. On Linux, Auburn Sounds ships LV2 and VST3 builds of Graillon 3 for Ubuntu on its own site.
- A dry, single vocal take. Pitch correction detects one pitch at a time; harmonies, reverb or backing-track bleed give it two, and it guesses. Record the vocal on its own track, dry, and add the space afterwards.
- The song’s key, or its chord chart. The tuner needs to know which notes are allowed.

Step 1: What Audacity can do without a plugin
Audacity’s built-in pitch tool is Change Pitch, at Effect ▸ Pitch and tempo ▸ Change pitch. It shifts the selected audio up or down while keeping its length. The dialog shows the estimated start pitch of the selection. You enter the change as a note (From pitch and To pitch, each a note and an octave), in Semitones and Cents, as a frequency, or as a Percentage change, and preview before applying. The Change Pitch page in the Audacity manual lists every control.
That covers one correction job. If a single held note is flat, select just that syllable, enter a positive number of cents (a semitone is 100 cents), preview until it sits, and apply. Every note inside the selection moves by the same amount, so a selection containing a melody is transposed and the flat note stays flat relative to its neighbours. Autotune means detecting each note and moving only the ones that miss; Change Pitch detects nothing. For more than a couple of wrong notes, you need a plugin.

Step 2: Install Graillon 3 from MuseHub
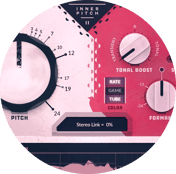
Graillon 3 is a real-time vocal tuner by Auburn Sounds. Real-time means it detects the pitch as the audio plays and moves it toward the nearest allowed note as it goes, with no note-by-note editing screen. The free edition on MuseHub includes the pitch correction itself, with a natural mode and a hard-tune mode, plus a pitch shifter, formant shifting, three pitch engines, and a small vocal chain (compressor, gate, chorus, preamp, bitcrusher). Auburn’s paid Full Edition, sold on its own site, adds Pitch-Tracking Modulation, per-note keyboard tuning and a vocal doubler; the label in the plugin’s header reads Upgrade to Pro. Nothing in this guide needs them.
Open the Plugins section in MuseHub, find Graillon 3 and click Get for free. MuseHub puts it in the standard plugin folders, so there is nothing to move by hand. On macOS it installs both the VST3 and the Audio Unit version. If you install from Auburn’s site instead, use the VST3 build, or the Audio Unit build on macOS; the VST2 build will not appear in Audacity 4.

Its page in the MuseHub app names Auburn Sounds as the developer and has one button to install it.

Step 3: Add it to the vocal track as a realtime effect
- Start Audacity. It checks for new plugins on launch and asks to validate them; click Validate. If Audacity was already open while MuseHub installed, choose Effect ▸ Plugin manager and rescan in the Manage plugins dialog.
- Import the vocal (File ▸ Import) or record it, and click the track to select it.
- Press E, or click Effects on the track, to open the Realtime effects panel.
- Click Add effect and pick VST3 ▸ Auburn Sounds ▸ Graillon 3. Its window opens as soon as it is added; clicking its name in the panel reopens it later.
- Press play. The power button next to the effect bypasses it, which is how you hear the take with and without correction.
A realtime effect leaves the recorded waveform alone. You can keep changing its settings while the track loops, and it is applied when you export. How to use effects and plugins in Audacity covers the panel, the Master section and the plugin manager in full.
In the Add effect list, the built-in realtime effects sit under Audacity, and third-party plugins are grouped by format (AudioUnit, VST3) and then by developer.

Once added, Graillon 3 sits in the track’s effect stack, and its window, titled Graillon 3 - Vocal, opens over the project.

Step 4: Set the key on Graillon’s keyboard
Graillon 3 corrects toward the notes switched on in its keyboard. The free edition has no scale menu; you set the key by switching notes on and off. Click a key to switch that note off, click it again to switch it back on, and check the note ring above the keyboard, which shows the notes that are active. For C major or A minor, switch off the five black keys. For any other key, leave exactly the seven notes of that scale on and switch the other five off. If the song borrows a note from outside its key, switch that one back on.
Graillon never asks for the root note, only for the allowed notes. A minor and C major share all seven, so they are the same setting, and the screen does not show which of the two you meant.
The key matters more than any other setting. With all twelve notes on, a note sung a quarter-tone flat sits halfway between two targets, and the tuner may pick the lower one, so the phrase comes out with the wrong melody. With the seven notes of the key on, most of those wrong choices disappear. If you do not know the key, take it from the chord chart and test on the chorus. Leave the reference A at 440 Hz unless the backing track was tuned elsewhere.

Step 5: A correction nobody hears, or the hard-tuned effect
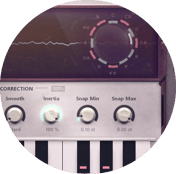
Five controls in Graillon’s Correction section decide how audible the tuning is. The names are Auburn’s.
- Correction Amount is how far a note is pulled toward its target, 0 to 100%. Auburn’s guide says the useful values are 0 and 100, so treat it as a switch.
- Smooth is the speed of the move between notes. At minimum, every note jumps instantly, which is the hard-tuned sound. Raised, the voice glides into the note the way a singer does.
- Snap Min is the deviation a note is allowed before correction starts. Above zero, vibrato and small slides are left alone.
- Snap Max is how far a note may be pulled, up to eight semitones by default. Lowering it stops a badly missed note being dragged to a distant target.
- Inertia makes a chosen note stick, which steadies wobbly notes and, set high, can change the melody.
Auburn lists four ways to make the correction less obvious: decrease Correction Amount, increase Smooth, increase Snap Min, decrease Snap Max. For a natural fix, keep Correction Amount at 100, raise Smooth until the slides sound sung, add a little Snap Min so the vibrato survives, and lower Snap Max. For the hard-tuned effect, set Smooth to its minimum and Snap Min to zero, and switch on exactly the notes of the key, because the effect is the instant jump between notes and a wrong target is very audible. Sing close to the notes; the tuner adds the snap.
Leave the Dry slider, next to Wet at the top right, at -inf dB; mixing the untuned voice back in stacks two pitches and sounds like a chorus. The G3 engine is the default; I2 sounds more natural on difficult material at a much higher CPU cost.
Step 6: Export the tuned vocal
Choose File ▸ Export audio. Audacity mixes the project to one file and applies each track’s volume, pan and effects on the way, so the tuned vocal is what lands in the file. There is no separate render step. If you want the tuned audio as a waveform to keep editing, export it and import the result; Audacity 4.0 has no command that commits a track’s effects to its waveform.

GSnap and MAutoPitch in Audacity 4
The two free tuners every older guide names are GSnap and MAutoPitch. Whether they load depends on their plugin format, because Audacity 4 dropped VST2.
| Plugin | Formats the developer lists | Loads in Audacity 4? |
|---|---|---|
| Graillon 3 free edition (Auburn Sounds) | VST3, Audio Unit, LV2, plus VST2, AAX, CLAP; Windows, macOS, Linux | Yes, on all three systems |
| MAutoPitch (MeldaProduction) | VST, VST3 and AAX on Windows; VST, VST3, AU and AAX on macOS; no Linux build | Yes, as VST3 or AU; no Linux |
| GSnap (GVST) | Described only as a VST plugin, with downloads for Windows VST hosts and for Mac; no VST3 build listed | No. It works in Audacity 3 |
GSnap is the classic free tuner those guides show. In Audacity 3 it still works, snapping to the notes you tick on a small keyboard or to notes you play over MIDI, on monophonic material only. In Audacity 4 it does not appear in the effect list at all. MAutoPitch is a full free corrector with depth, speed and formant controls; it loads in Audacity 4 on Windows and macOS, has more interface to learn than Graillon, and has no Linux version. Both install from their developers’ sites rather than through MuseHub.
The simplest option is also on MuseHub. Muse Group’s free MuseFX collection includes PitchFix, a real-time correction for monophonic vocals. It has one large knob for the amount and presets you step through with arrows, starting at All-rounder. It has no key or scale selector, so you cannot tell it which notes are allowed. When you want a vocal pulled in tune with nothing to set, start there; when the song needs a key, or you want to choose how the correction behaves, use Graillon.

Common mistakes
- The wrong key. The symptom is a melody that sounds rewritten, with notes landing next to where the singer put them. Set the key from the chords; if it still sounds wrong, switch on the notes of the parallel major or minor instead, which changes three notes.
- More than one pitch in the take. A harmony line, a doubled vocal, reverb or the backing track leaking into the microphone gives the detector two notes. Tune each voice on its own dry track and put the reverb after the tuner in the stack.
- Monitoring through speakers. Audacity 4 passes the input through the track’s realtime effects while you record, so with Graillon on the vocal track you hear yourself tuned as you sing. Wear headphones; through speakers, the tuned voice leaks back into the microphone and the tuner hears two pitches. The recorded waveform stays dry, so you can still change the settings afterwards.
- The plugin is not listed. It has not been validated, or it is the VST2 build. Restart Audacity and click Validate, or rescan from the plugin manager; then check the format.
- Tuning a noisy take. Breaths, room noise and headphone bleed are detected as notes and get tuned. Put a gate before the tuner (Graillon has one built in) or run noise reduction in Audacity first, and keep the order gate, tuner, compressor, reverb.
Example settings
Three starting points in Graillon 3’s own control names. Auburn’s guide gives directions rather than numbers, so move one control at a time from here and use the power button to compare.
| Control | Transparent fix | Pop vocal | Hard-tuned effect |
|---|---|---|---|
| Keyboard | The seven notes of the song’s key | The seven notes of the song’s key | The notes of the key, checked one by one |
| Correction Amount | 100% | 100% | 100% |
| Smooth | High, until slides sound sung | Middle | Minimum |
| Snap Min | A little above zero, so vibrato survives | Zero | Zero |
| Snap Max | Low, two or three semitones | Default | Default |
| Inertia | Low | Low to middle | Middle |
| Engine | G3 | G3 | G3 |
When a paid tuner is worth it
Graillon’s free edition covers real-time correction and the hard-tuned effect, which is most of what a home vocal needs. What it does not do is show you the notes. A graphical editor such as Celemony Melodyne draws every note after the take so you can move one flat word or redraw its vibrato by hand, and it can tune stacked harmonies a real-time tuner cannot separate. The best autotune plugins compares the paid options.
FAQ
Next steps
A tuner works best on a take that was close to begin with, so record a clean, dry vocal first. Pitch is one step of the vocal chain; mixing vocals covers the EQ, compression and reverb that follow it, and how to use effects and plugins in Audacity shows where each goes in the realtime stack. More pitch and vocal tools are in the MuseHub plugin catalog.
Get Audacity, Graillon 3 and MuseFX in one place — download MuseHub free.