How to fade in and out in Audacity
To fade audio in or out in Audacity 4, select the start or end of the clip and choose Effect ▸ Fading ▸ Fade In or Fade Out. The fade applies straight away, across the length you selected. For a fade you can shape and change later, draw it with the clip gain line instead.
This guide covers both methods, the other fades in Audacity’s Fading menu, how long a fade should be, and how to crossfade.
Tested on Audacity 4.0.2 on macOS. Shortcuts are written for Mac; Windows uses Ctrl where Mac uses Cmd.
Audacity and tools on MuseHub


Method 1: Fade In and Fade Out effects
The quickest fade, and the right one for most intros and endings.
- Select the part to fade. For a fade-out, drag across the last few seconds of the clip. For a fade-in, drag across the first few.
- Choose Effect ▸ Fading ▸ Fade Out (or Fade In). It applies at once, with no dialog.
- Play it back. If the fade feels too short or too long, press Cmd+Z (Windows: Ctrl+Z), change the selection and apply it again.
The fade always runs across exactly what you selected, so the length of your selection is the length of the fade.
The other fades in the Fading menu
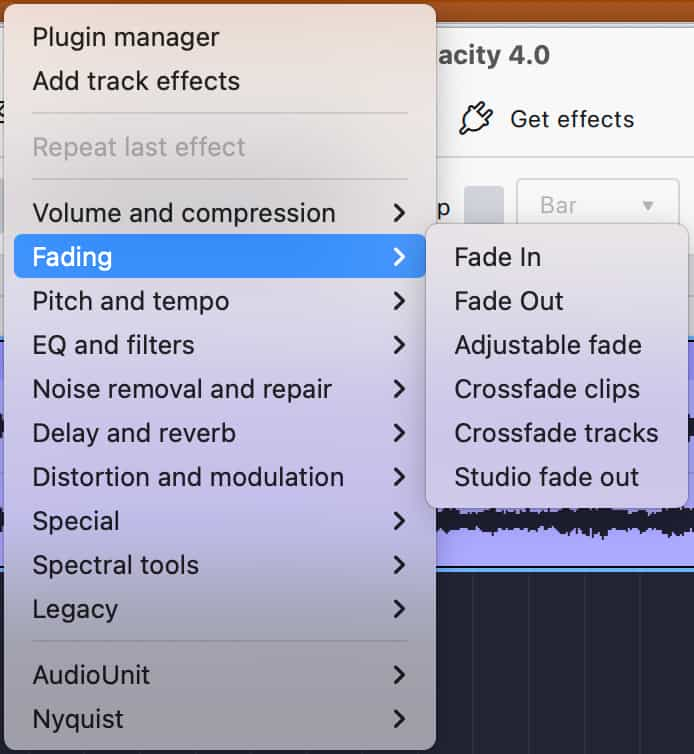
The Fading menu has four more options beside Fade In and Fade Out:
| Option | What happens | Use it for |
|---|---|---|
| Adjustable fade | Opens a window with settings | A fade with a curve, or one that stops partway |
| Studio fade out | Applies straight away | A smoother fade-out at the end of a song |
| Crossfade clips | Applies straight away | Blending two clips into each other |
| Crossfade tracks | Opens a window with settings | Blending one track into another |
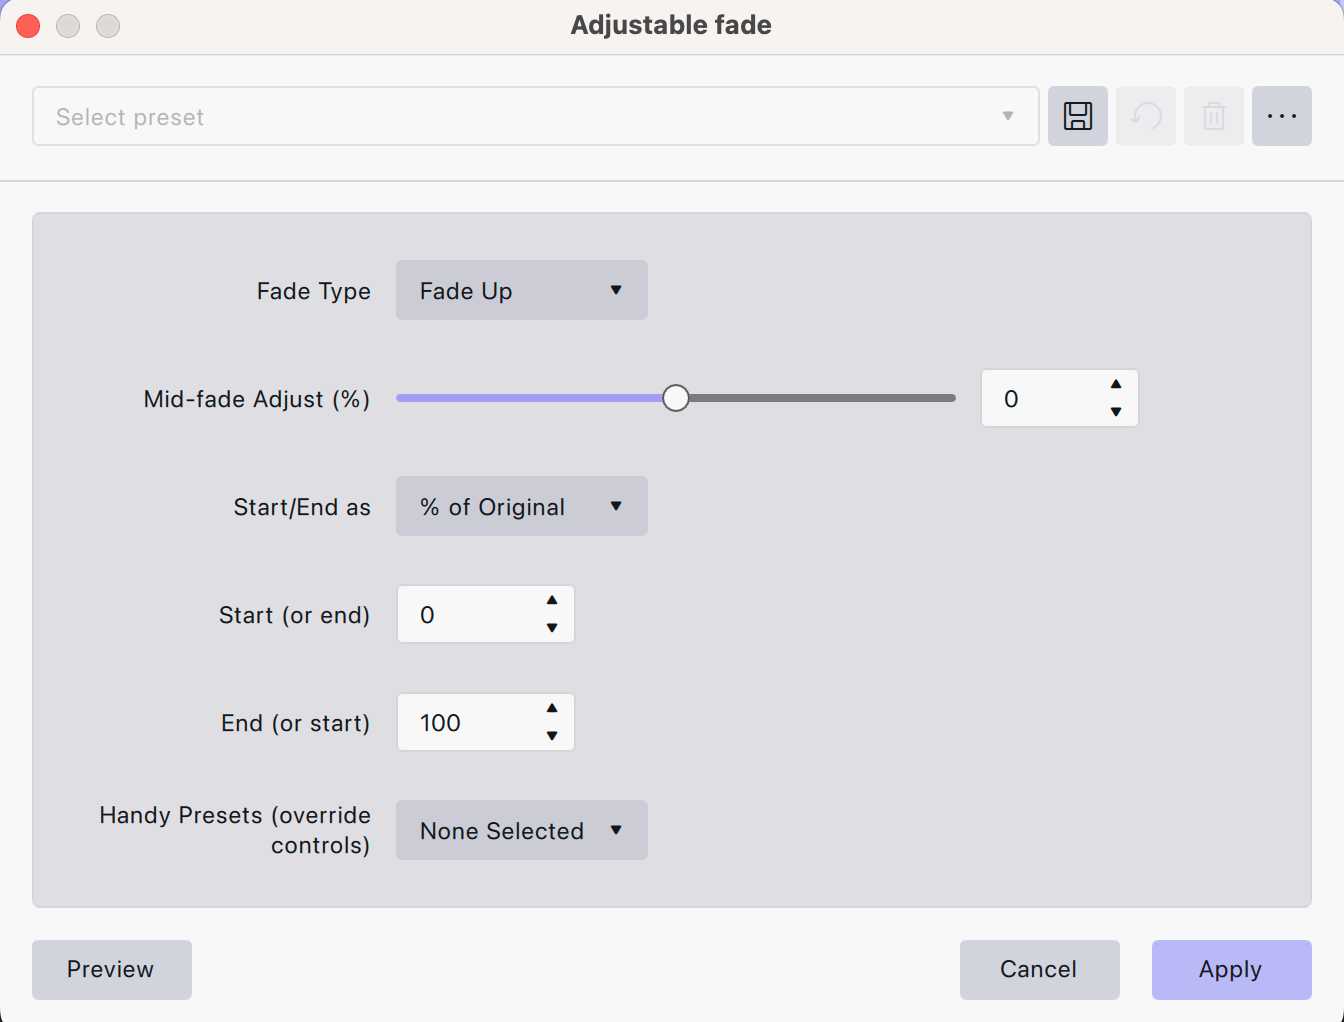
Adjustable fade is the one to reach for when a straight line sounds wrong. Its window sets the Fade Type (Fade Up or Fade Down), a Mid-fade Adjust (%) slider that bends the curve, and where the fade starts and ends as a percentage of the original level, so a fade can stop at half volume instead of silence. Handy Presets fill in the settings for common shapes.
Method 2: Draw the fade with clip gain
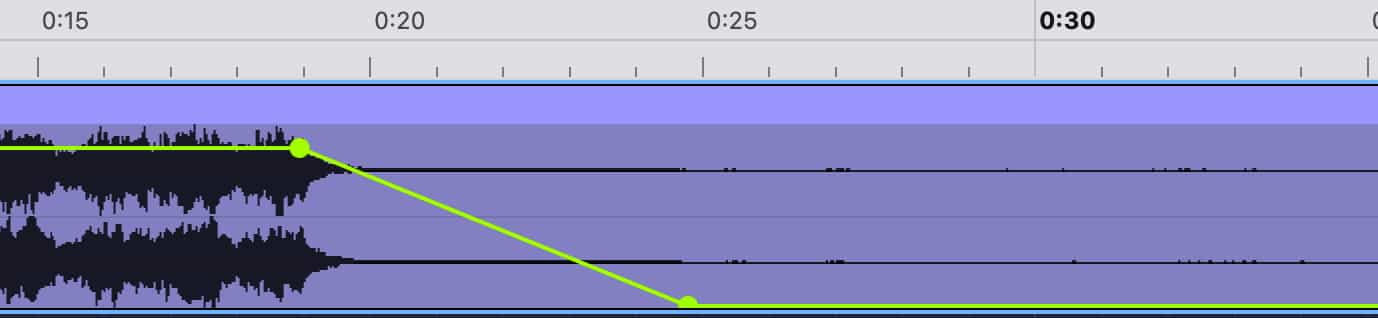
The effect writes the fade into the audio. To keep a fade you can change later, or to make one that is not a straight line, draw it.
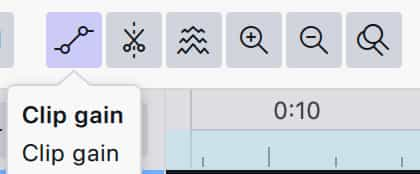
- Click Clip gain in the toolbar: the icon of a line between two points, just left of the zoom buttons. Every clip shows a volume line.
- Click the line where the fade should start to add a point.
- Add a second point where the fade ends, and drag it down to silence for a fade-out, or start low and rise for a fade-in.
- Drag points at any time to change the fade.
This is also how you dip music under a voice and bring it back up, which a podcast intro often needs.
How long should a fade be?
| Use | Typical length | Why |
|---|---|---|
| End of a song | 5 to 15 seconds | Long enough to sound deliberate |
| Podcast intro music under speech | 1 to 3 seconds | Gets out of the voice’s way quickly |
| Removing a click at a cut | A few milliseconds | Too short to hear as a fade |
| Sound effect or ambience | 0.5 to 2 seconds | Hard starts on a background sound are obvious |
These are starting points. Play the fade back in context and trust your ears.
How to crossfade two clips
A crossfade fades one clip out while the next fades in, so the change between them is smooth. Audacity 4 has two commands for it in Effect ▸ Fading:
- Crossfade clips blends two clips into each other and applies straight away, with no window.
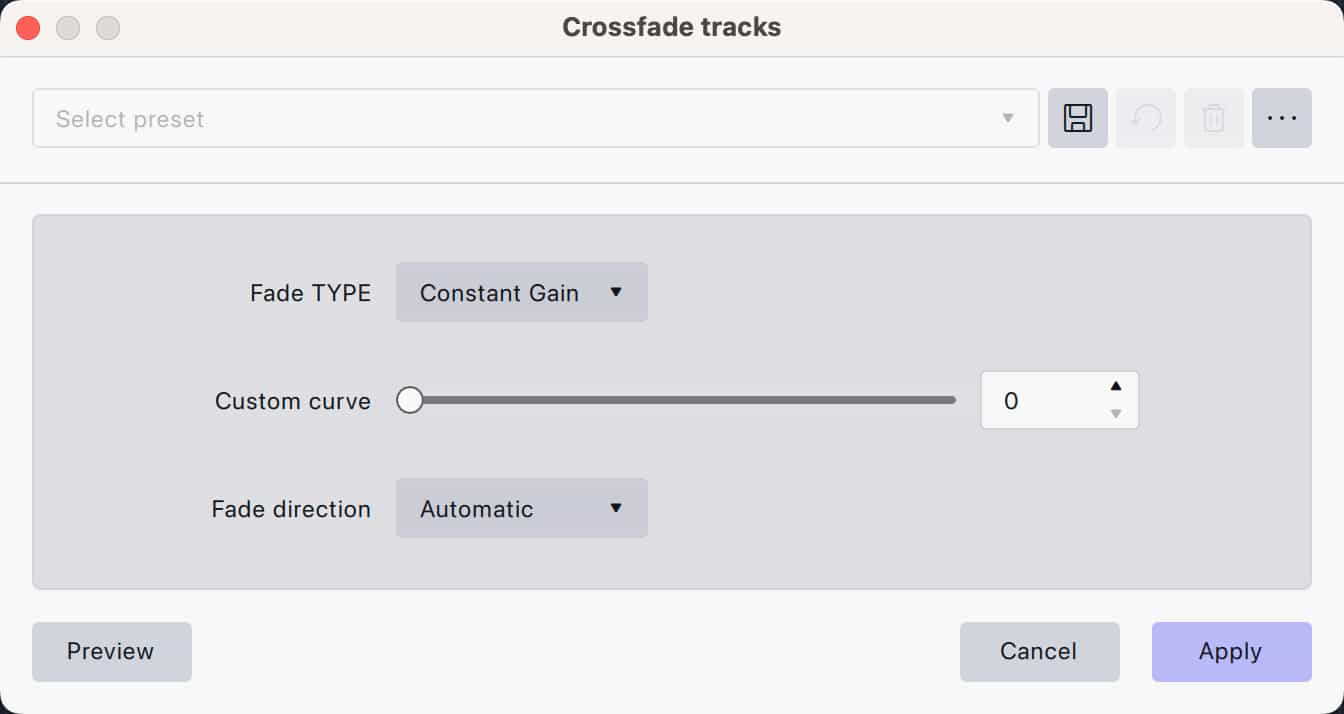
- Crossfade tracks blends one track into another. It opens a window with a Fade type (Constant Gain by default), a Custom curve slider and a Fade direction (Automatic by default).
You can also crossfade by hand: put the clips on separate tracks so they overlap, then fade the end of the first out and the start of the second in across the same stretch.
Common mistakes
- A fade that ends before the clip does. A fade-out that stops early leaves a quiet tail and then a hard cut. Select right to the end of the clip.
- Fading the voice with the music. Put music and voice on separate tracks first, so the fade only touches the music.
- A fade-out that is too short at the end of a song. Under a few seconds it sounds like a mistake rather than an ending.
FAQ
Next steps
For the whole podcast chain, including fades on intro music, see how to edit a podcast in Audacity. For more basic edits, see how to trim and cut audio in Audacity. Audacity 4 with Tutorial adds a video course to Audacity 4.
Get Audacity and its free plugins in one place — download MuseHub free.