How to remove echo from audio with Extract:Dialogue 2
Echo makes a voice sound far away, with a tail after every sentence. To remove echo from audio, you have to separate the voice from the room it was recorded in. Extract:Dialogue 2 by Acon Digital does this in real time and gives the voice, the room reverb and the background noise a fader each.
This guide shows how to remove echo and reverb from a voice recording with Extract:Dialogue 2, with Audacity 4 as the example host. It starts with what the built-in tools can do, then walks through the plugin step by step, with starting settings for common recordings and the mistakes that make a voice sound processed.
Tested on Audacity 4.0.1 on Windows 11 and macOS Sequoia with Extract:Dialogue 2 version 2.0.12.
To remove echo from a voice recording, insert a dialogue plugin that separates the voice from the room, such as Extract:Dialogue 2, and lower its Reverb fader until the voice sounds close but still natural. EQ and noise gates can only shorten the echo in the pauses between words.
Dialogue cleanup on MuseHub
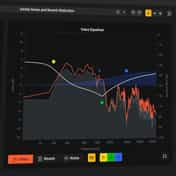

Why echo is hard to remove
Your voice reaches the microphone directly, then again a few milliseconds later from the desk, the walls and the ceiling. In a small room with hard surfaces, those reflections pile up into the hollow sound most people call echo. Strictly, it is room reverb, a dense wash of reflections rather than a single repeat. What reverb is and how it builds up explains the parts.
The reflections are recorded into the same waveform as the voice, at the same frequencies. A noise gate turns the audio down in the pauses, so it shortens the tail you hear between sentences. It has to open while you speak, and the echo under the words stays. An EQ cut thins the voice as much as the room, because both share the same range.
Extract:Dialogue 2 uses AI models trained to tell the parts of a dialogue recording apart. It splits the signal into three channels:
- Voice. The direct sound of the speaker.
- Reverb. The room reflections that follow the voice.
- Noise. Steady background sound such as hum, hiss, air conditioning or traffic.
Each channel has its own fader, mute and solo button. So removing echo becomes a mix decision. You keep the voice where it is and turn the room down.
What you’ll need
- Extract:Dialogue 2. It runs on Windows 10 and 11 and on macOS 10.13 or later, natively on Apple Silicon and Intel, at sample rates up to 96 kHz. It installs and updates through the MuseHub app, which also handles the licence, so there is no serial number to enter. Buying it needs a MuseHub account.
- A host for the plugin. Audacity 4 is free and installs through MuseHub; the plugin loads there as VST3 on Windows and as VST3 or Audio Unit on macOS. It also runs in DAWs and video editors that load VST3, AU or AAX plugins, including Pro Tools, Logic Pro, Reaper, DaVinci Resolve and Premiere Pro.
- Headphones. Room reverb is a quiet detail, and laptop speakers hide most of it.
- The raw recording. Work on the take as it was recorded, before compression or other processing.
What you can do without a plugin
Audacity has no built-in effect that removes reverb. Three built-in tools still help.
- Noise gate.
Effect ▸ Noise removal and repair ▸ Noise gatelowers the audio below a threshold. Set gently, it shortens the tail in the pauses. Set hard, it makes the room switch on and off between sentences. - High-pass filter. A low cut takes out rumble and some boom. It does nothing about the reflections in the voice range.
- A drier take. Move closer to the microphone and put soft material near hard surfaces. It is the most reliable fix when you can record again.
How to remove breaths, mouth clicks and room echo in Audacity covers these built-in tools in full.
For the echo under the words, you need a tool that can separate the voice from the room.
Remove echo with Extract:Dialogue 2

The steps below use Audacity 4. In a DAW, insert the plugin on the voice track or the dialogue bus and continue from step 2.
1. Add the plugin to the voice track
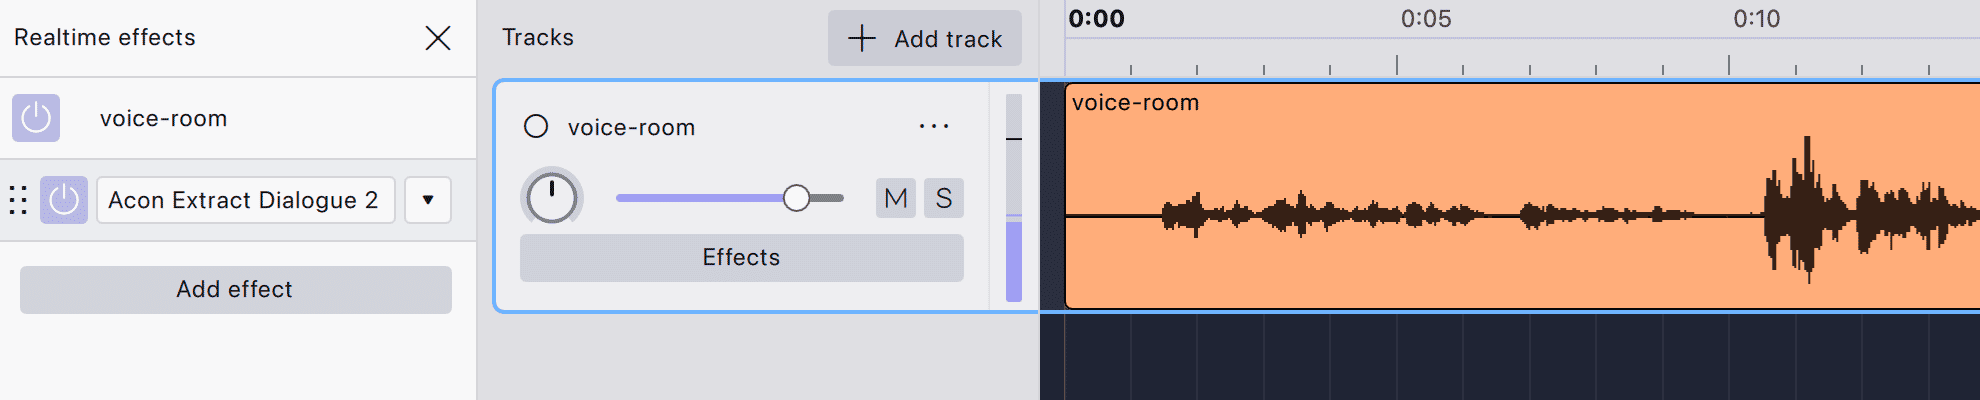
- Open the realtime effects panel. Select the voice track and press E. The panel is called Realtime effects.
- Add Extract:Dialogue 2. Click Add effect and choose
VST3 ▸ Acon Digital ▸ Acon Extract Dialogue 2. Audacity lists it under that name; the plugin window calls itself Extract:Dialogue 2. - Play the recording. The plugin works on playback, so you hear every change as you make it.
Sound On Sound’s review measured the plugin’s latency at about 66 milliseconds at 96 kHz. Audacity compensates for it, so playback stays in sync and the export lines up with the original, but it is too long for monitoring through the plugin while you record.
2. Hear each part on its own
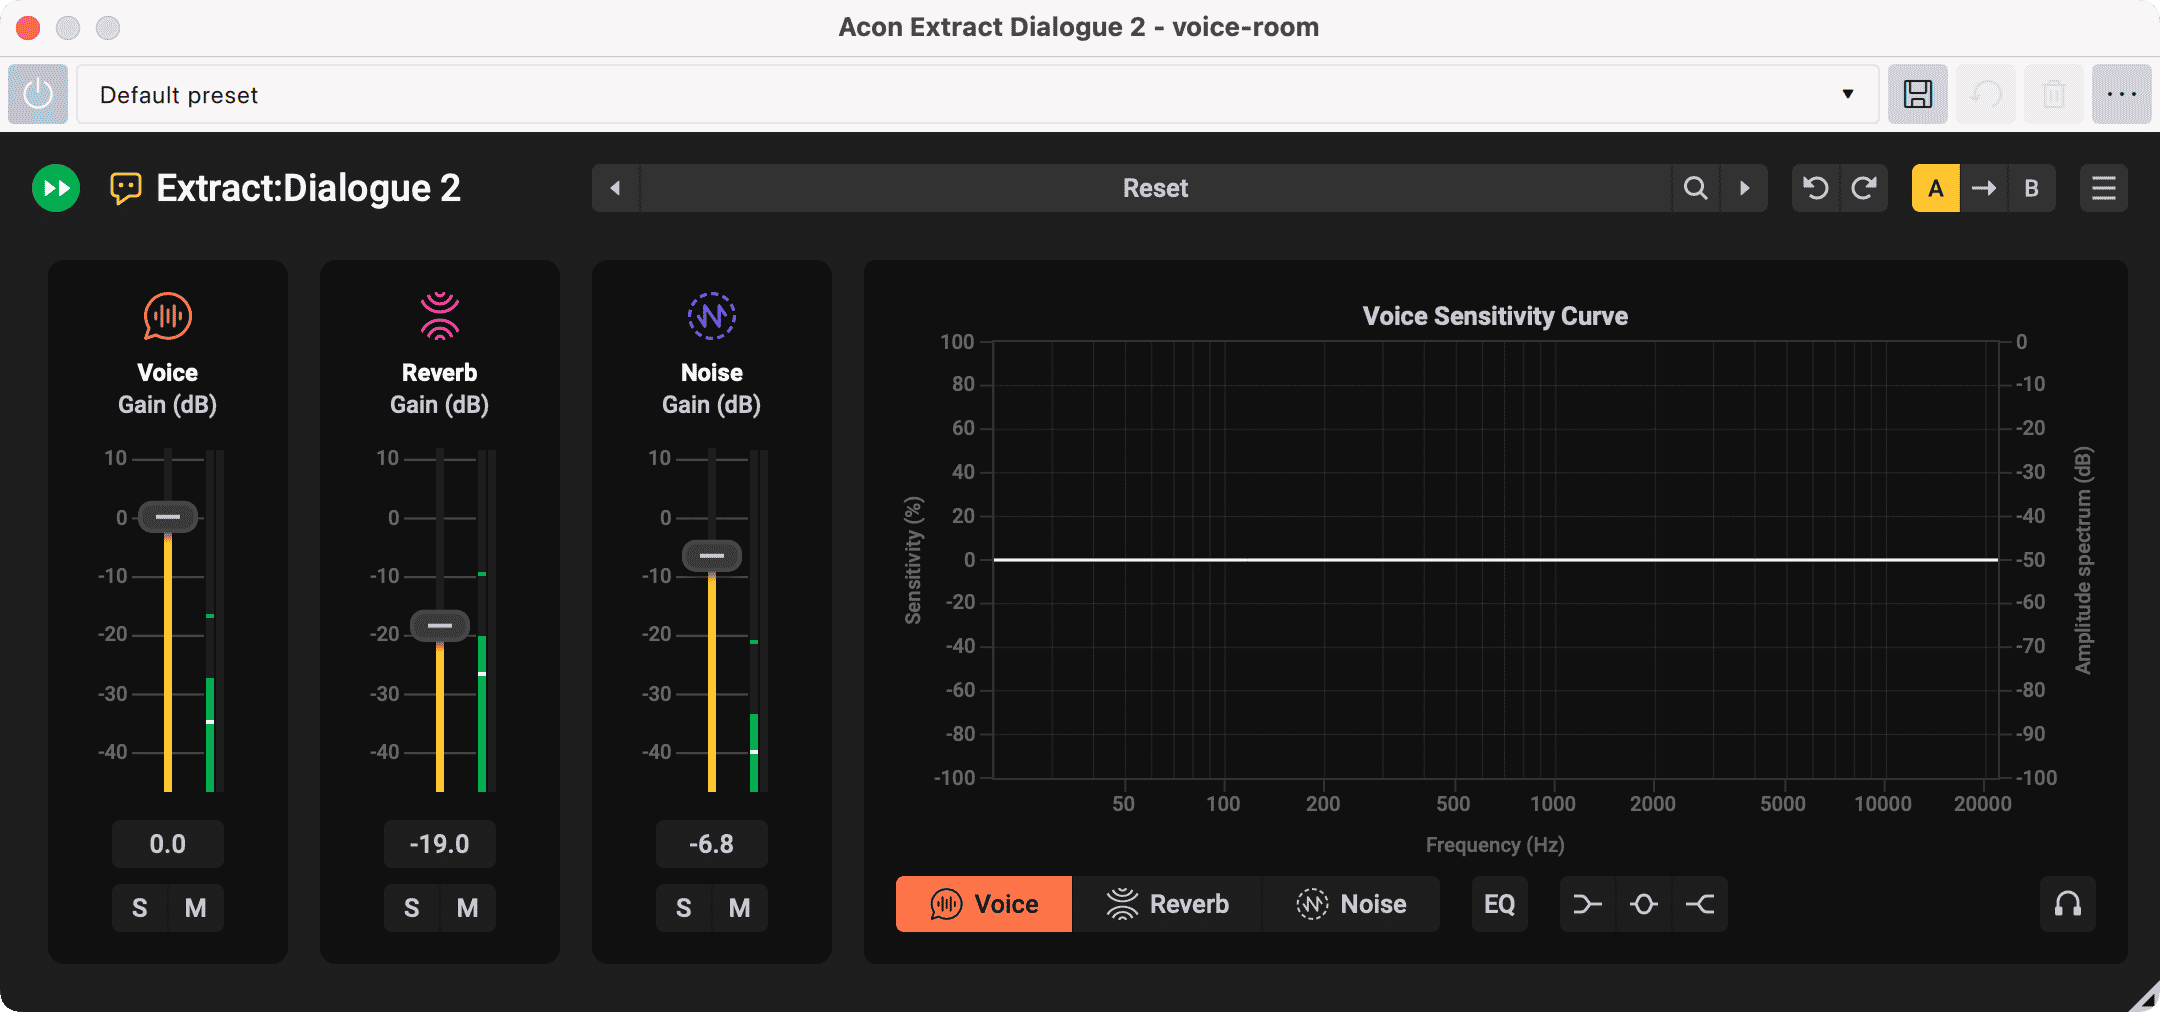
Before you change anything, solo each channel in turn with its S button. Solo the Reverb channel and you hear only the room, with the voice gone. Solo the Noise channel for the hum and hiss underneath. Solo the Voice channel to hear what will remain. Turn every solo off before the next step.
3. Turn the room down
Play a passage with a clear tail after a sentence and pull the Reverb fader down slowly. Each fader is labelled Gain (dB) and runs from +10 to −48 dB. Stop where the tail is short and the voice still sounds like a person in a room.
To check what the plugin takes away, click the headphones button. It plays only the removed signal. If you hear syllables of the voice in it, the setting is too strong, so raise the Reverb fader a little.
4. Lower the noise if it bothers you
Pull the Noise fader down the same way. Keep some of it. A voice over complete silence sounds cut out, and the noise between sentences holds the recording together.
5. Aim the plugin at the right frequencies
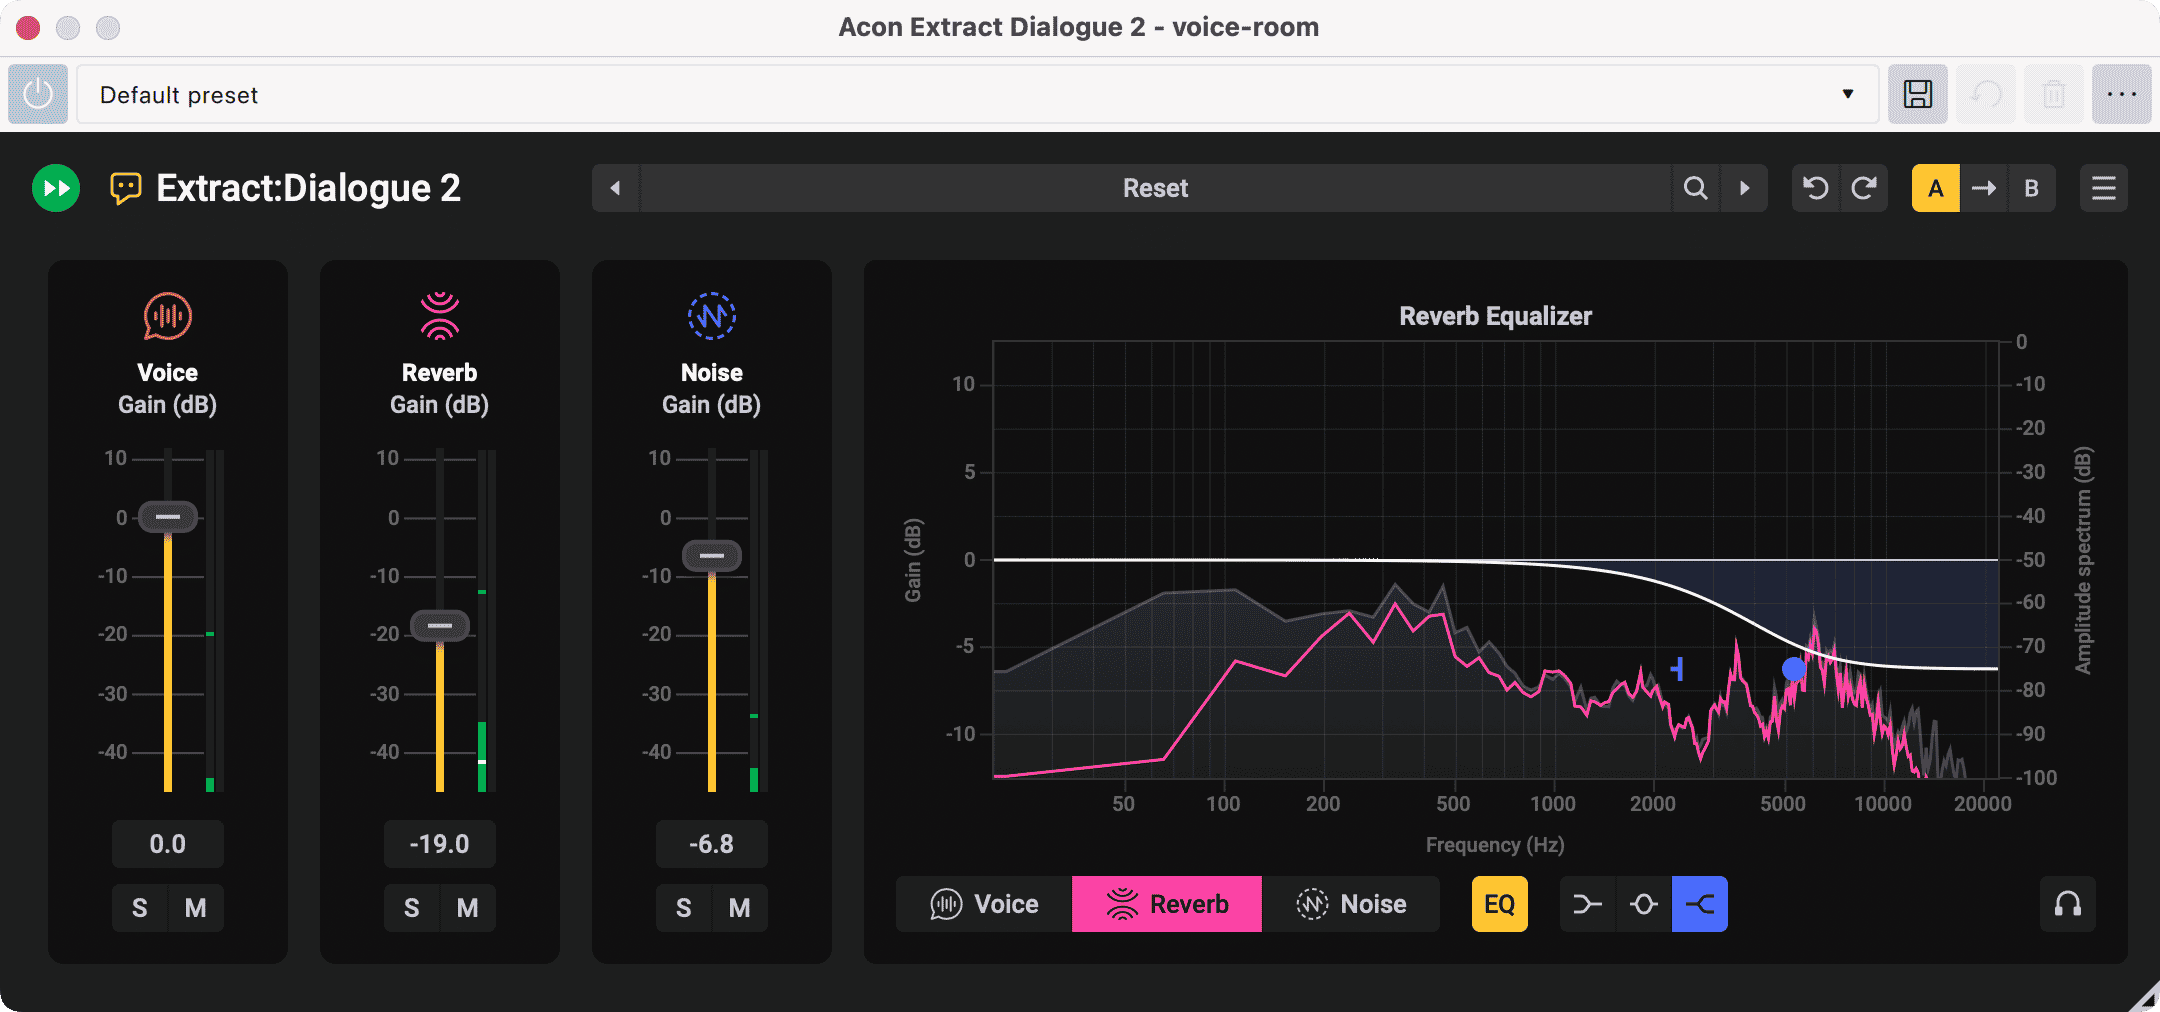
Each channel has a sensitivity curve that sets how much of the signal the plugin assigns to that channel at each frequency. Click the Reverb button under the curve to show the Reverb channel’s curve. The curve has a low shelf, a mid band and a high shelf. Drag a node to focus the detection, for example on bright, high reflections. As Production Expert’s first look points out, sensitivity above 100% means less processing, so more of the original passes through.
6. Shape each part with its own EQ
Click the EQ button and the curve becomes a three-band equalizer for the selected channel, with buttons for the low shelf, mid band and high shelf. Cutting the highs of the Reverb channel softens a bright room without dulling the voice. Cutting the lows of the Noise channel removes rumble without thinning the speaker.
7. Keep the result
In Audacity, realtime effects play live and are applied when you export with File ▸ Export audio. To write the result into the clip instead, choose Effect ▸ VST3 ▸ Acon Digital ▸ Acon Extract Dialogue 2, set the faders and click Apply. That instance has its own settings, separate from the one in the realtime panel. In a DAW, bounce or render the track. Pro Tools also has an AudioSuite version that writes the result to the clip.
Before and after
The two players below are the same spoken take, a voice recording with room reverb added. In the first, listen for the tail after each sentence and the boxy colour on the vowels.
Original
The second is the same take through Extract:Dialogue 2 with the Voice fader unchanged, the Reverb fader at −19 dB and the Noise fader down a little. Listen for the shorter tail and a voice that sounds closer to the microphone. It also plays quieter, because the room made up part of the level.
Extract:Dialogue 2
Voice: “Bei Hennef” by D. H. Lawrence, read by Theo Douglas for LibriVox (public domain), with room reverb added.
Starting settings for common recordings
These are directions to start from, then adjust by ear with the headphones button.
| Recording | Voice | Reverb | Noise | Also try |
|---|---|---|---|---|
| Podcast in an untreated room | Unchanged | Down until the tail is short | Down a little | Cut the highs on the Reverb EQ if the room sounds bright |
| Interview or dialogue on location | Unchanged | Down partway, keep some room | Down partway | Keep enough room to match the picture |
| Whispered or quiet lines | Up | Unchanged | Unchanged | Raise the voice here instead of the clip |
| Tape hiss under the voice | Unchanged | Unchanged | Down a few dB | Boost a high shelf around 12 kHz on the Noise EQ |
| Stereo recording, voice in the middle | Unchanged | As above | As above | The stereo button next to the band buttons, shown on stereo tracks only, processes mid and side separately and uses more CPU |
Common mistakes
- Reverb fader all the way down. The voice turns thin and watery. Lower it until the tail is short and stop there.
- Expecting a small, hard room to disappear. Sound On Sound found strong first reflections, the ones that arrive soonest, the hardest part to remove. Record closer to the microphone next time.
- Using it on singing over music. The plugin is built for spoken dialogue. MuseHub lists sung vocals over music and surround formats as uses it is not intended for.
- Putting it after compression. A compressor raises the quiet parts of a recording, the room tail included. Put Extract:Dialogue 2 first in the chain.
- Monitoring through it while recording. The latency puts your own voice late in your headphones. Record dry and add the plugin afterwards.
Pro tips
- Use the room for distance. Reverb is also how a listener judges how far away a speaker is. Raise the Reverb fader slightly for someone at the far end of a room and lower it as they come closer. In a DAW, automate the fader.
- Lift whispers with the Voice fader. Raising the voice inside the plugin leaves the noise and the room where they are. Turning up the whole clip raises all three.
- Remove hiss without touching the voice. The dialogue mixer DeLaVanta Tabor boosts a high shelf around 12 kHz on the Noise channel’s EQ, then lowers the Noise fader a few dB. The hiss goes, and the voice keeps its top end.
- Split the parts onto their own tracks. In hosts with multi-output support, such as Pro Tools, the voice, reverb and noise can go to separate tracks for their own processing.
FAQ
Next steps
For more on plugins in Audacity, how to use effects and plugins in Audacity covers the realtime panel and installing through MuseHub. For the rest of a voice chain, see the best podcasting plugins or browse the MuseHub plugin catalog.
Get Extract:Dialogue 2 and the rest in one place: download MuseHub free.