How to make your voice sound pro in Audacity: a vocal chain for podcasts and voice-over
A clean recording can still sound amateur: thin, harsh on the S sounds and uneven in level. The fix is a vocal chain, a short row of effects that each do one job, in a set order. In Audacity 4 you build it in the realtime effects panel: an EQ to clean up the tone, a compressor to even out the level, a de-esser for sibilance, a touch of color, and a limiter on the master. This guide builds the chain with free effects first, then shows where a plugin does a step better.
This guide sets up the realtime effects panel, then walks the chain one step at a time, each with the free route first and a plugin where one helps. It ends with an all-in-one option and the mistakes that undo the work.
Tested on Audacity 4.0.1 on macOS Sequoia. Shortcuts are written for Windows; macOS uses Cmd where Windows uses Ctrl.
Vocal chain plugins for Audacity


The chain at a glance
| Step | What it fixes | Free route in Audacity 4 | Plugin that does it better |
|---|---|---|---|
| 1. EQ | Rumble, boominess, muddy tone | MuseFX Simple EQ | n/a |
| 2. Compression | Words that jump up and down in level | Compressor | n/a |
| 3. De-essing | Harsh S, SH and T sounds | MuseFX De-Ess | S1 De-Esser |
| 4. Color and polish | A flat, lifeless voice | None suited to speech | LANDR FX Voice |
| 5. Level for publishing | Loudness target and peaks | Limiter on the master, Loudness Normalisation | n/a |
| All in one window | Steps 1 to 4 | n/a | Burnish Vocal Chain |
What you need
- Audacity 4. It is free. Get it through MuseHub on Windows and macOS, or from audacityteam.org.
- MuseFX. A free bundle of effects on MuseHub, with the EQ and de-esser used below.
- A dry, clean voice recording. Record close to the microphone with no effects. Clean up noise, breaths and mouth clicks first; that is a separate job, covered in Audacity noise reduction.
- Headphones. Sibilance and over-compression are easy to miss on laptop speakers.
Set up the realtime effects panel
Realtime effects run while the track plays and leave the recording itself untouched, so you can change any setting later. They are applied when you export.
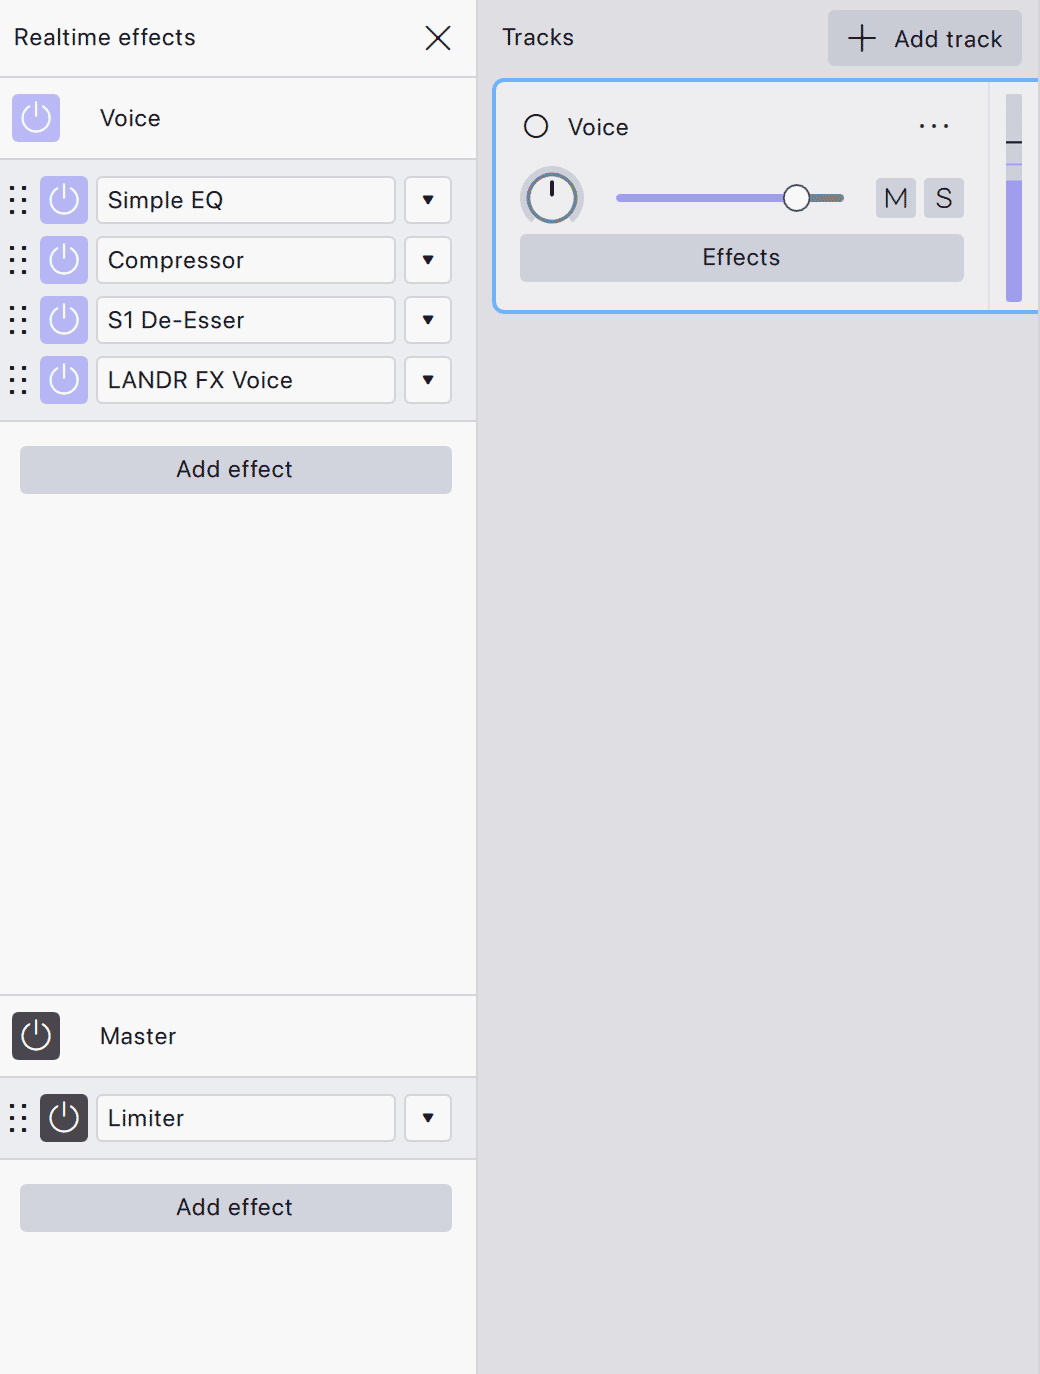
- Open the panel. Select the voice track and press E.
- Add effects in order. Click Add effect for each step. The list is grouped by format and then by maker, such as
VST3 ▸ MuseFX. Effects run from top to bottom; drag an effect by its ⠿ handle to move it. - Keep the limiter on the master. Track effects shape one voice. The Master effects section at the bottom of the panel processes everything you export, which is where the final limiter belongs.
How to use effects and plugins in Audacity covers installing plugins through MuseHub and validating them in Audacity.
Step 1: Cut the low end and the mud
Most voices carry nothing useful below about 80 Hz. That range holds rumble, desk bumps and air conditioning, and it makes compression react to noise instead of words. Cut it first.
Audacity 4’s own realtime effects include Bass and Treble, which only lifts or cuts the extremes and has no high-pass. Use MuseFX Simple EQ instead: click Add effect and choose VST3 ▸ MuseFX ▸ Simple EQ. Its presets remove mud and add air.
- High-pass at 80 Hz. Raise it towards 100 Hz for higher voices.
- Cut, don’t boost. If the voice sounds boxy, try a small cut somewhere between 200 and 400 Hz. Sweep slowly and stop where the voice opens up.
- Boost last, and little. A lift of 2 to 3 dB around 3 to 5 kHz adds clarity. Skip it if the voice is already bright, since it also lifts sibilance.
Step 2: Even out the level with the Compressor
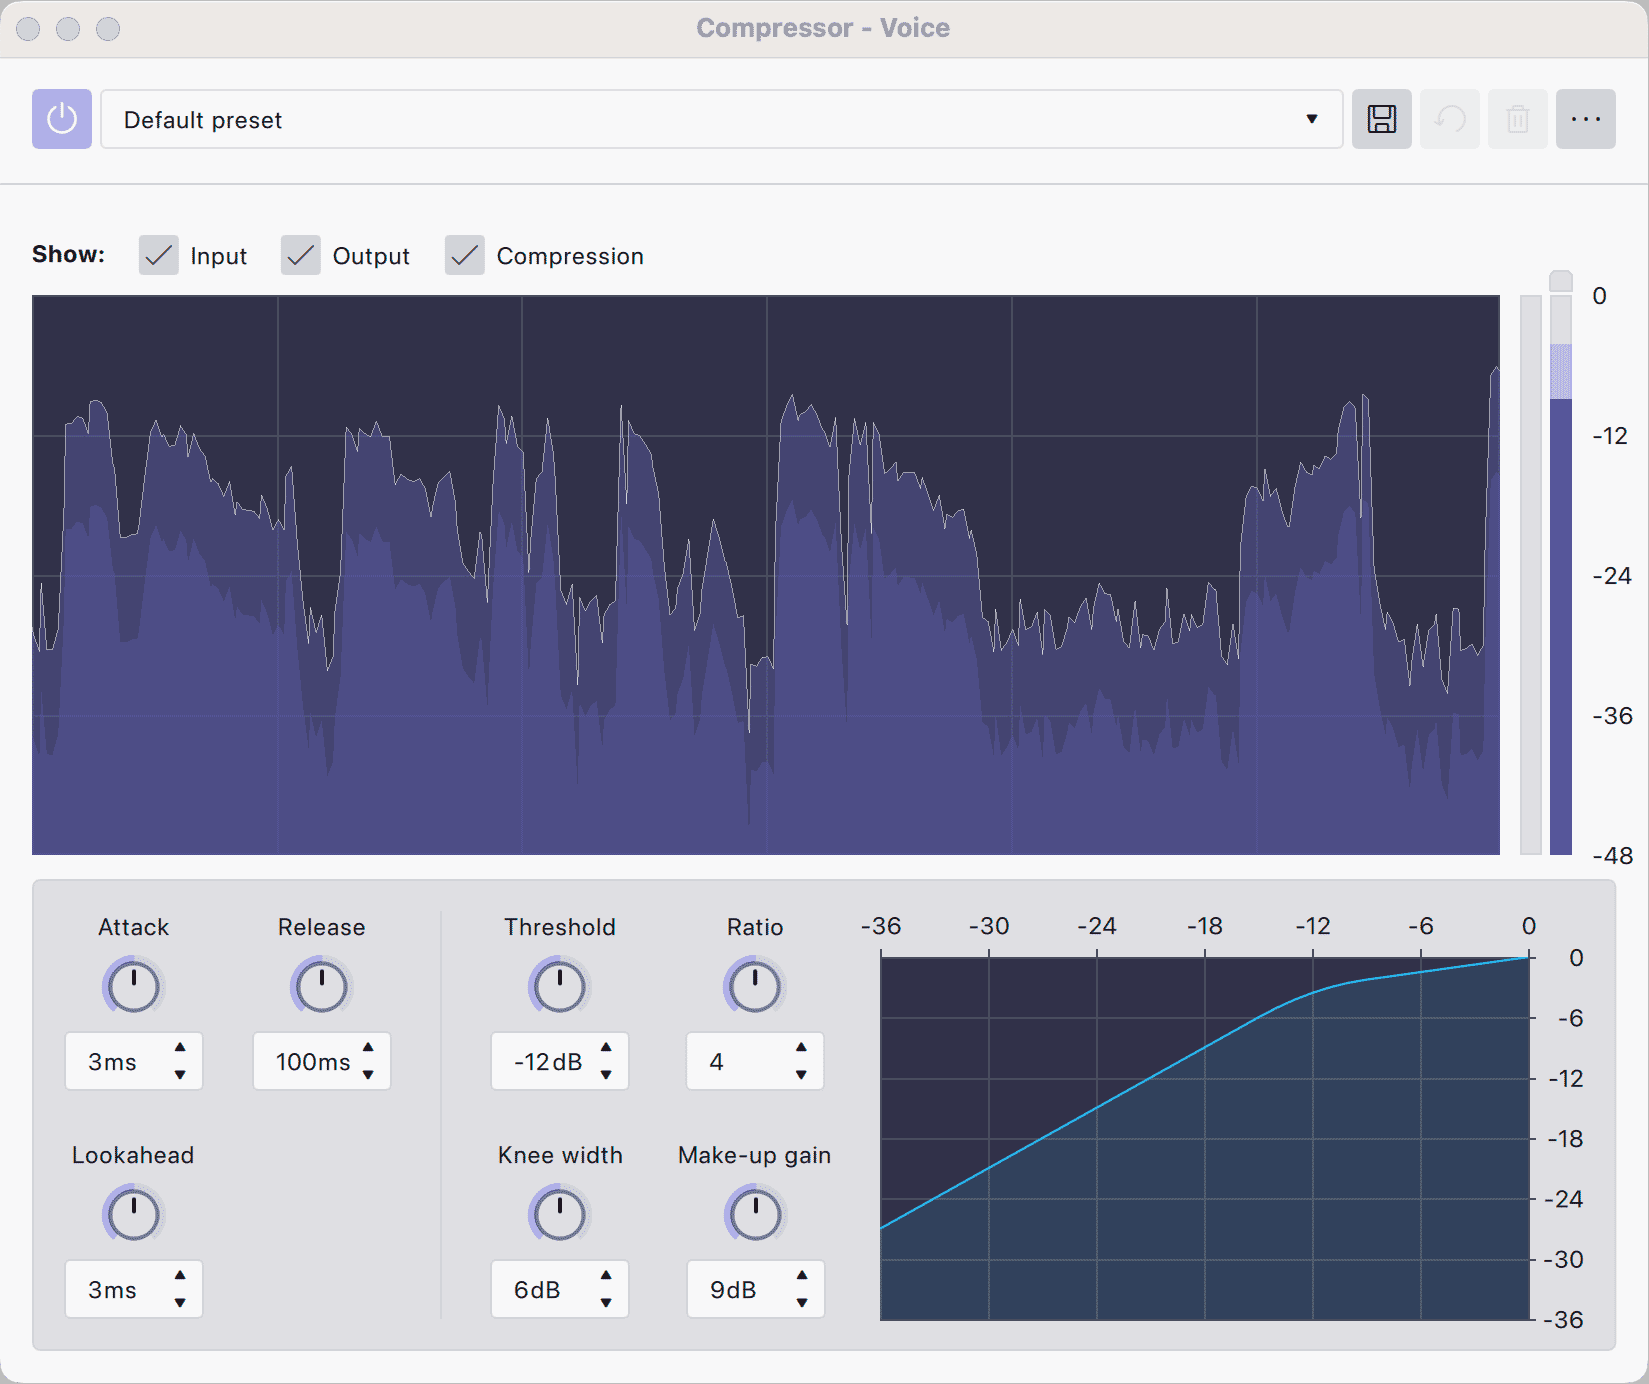
A compressor turns down the loudest words so the quiet ones can come up, which is what makes a voice sound close and steady. Audacity 4 has one built in: click Add effect and choose Audacity ▸ Compressor.
For speech, start here and adjust by ear:
- Ratio about 3:1.
- Threshold low enough that the loudest words are turned down by 3 to 6 dB.
- Attack around 10 to 30 ms, so the start of each word keeps its edge.
- Release around 100 to 150 ms.
- Make-up gain to bring the level back up.
Leave Lookahead and Knee width at their defaults.
How to make audio louder in Audacity explains what each control does.
Step 3: Tame the S sounds with a de-esser
Compression brings up everything quiet, and the S, SH and T sounds come up with it. A de-esser turns those down only when they get too loud. Put it after the compressor, so it catches what the compressor exaggerates.
Audacity has no built-in de-esser. MuseFX includes one, listed as De-Ess, with a single amount control and presets. It works well on a mild case.

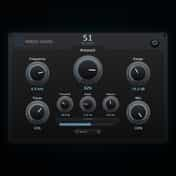
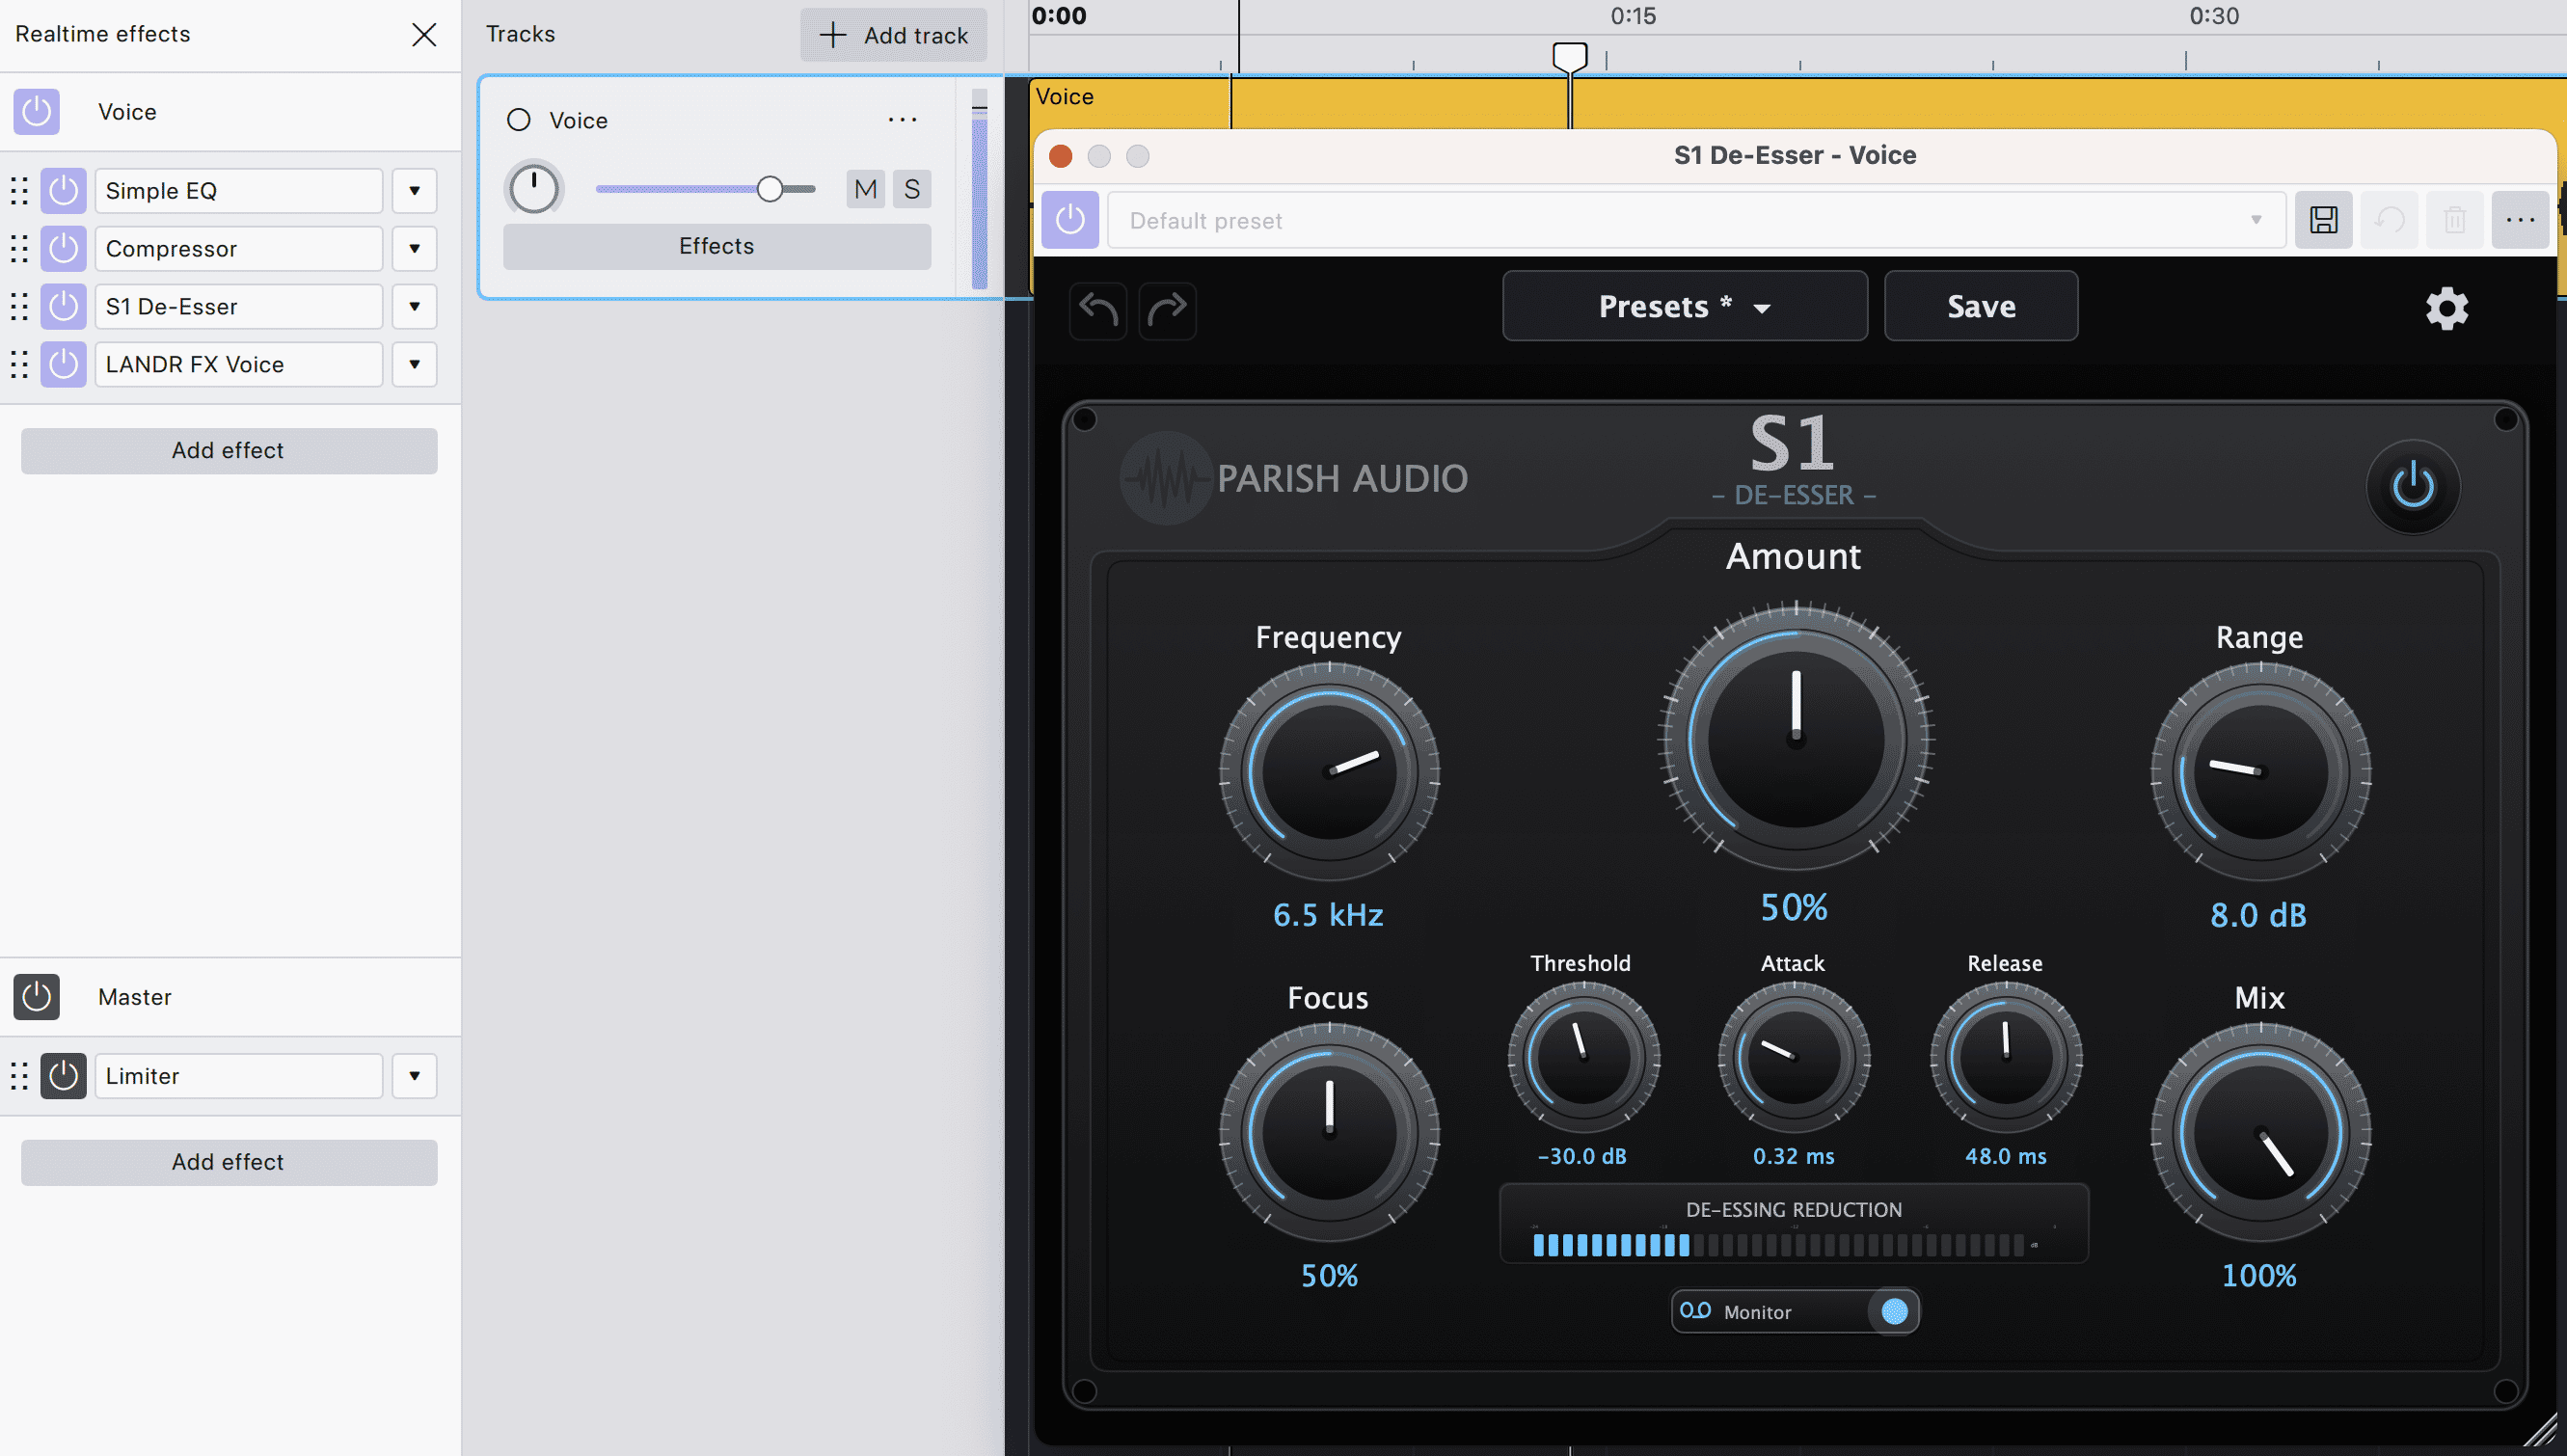
For control, use S1 De-Esser. S1 by Parish Audio targets the frequency range where the harsh consonants sit, instead of dulling the whole top end, and lets you set how strongly it reacts. Its Monitor switch plays only what it removes, so you can hear whether it is catching sibilance or taking away detail.
- Add it after the Compressor. Press E, click Add effect and choose
VST3 ▸ Parish Audio ▸ S1 De-Esser. - Find the S sounds with Monitor on. Play a sentence full of S sounds and move Frequency until you hear only the hiss of the consonants.
- Set Amount with Monitor off. Turn it up until the S sounds sit level with the rest of the word, then back off a little. The De-essing Reduction meter shows how much it takes away.
- Check for a lisp. If “s” starts to sound like “th”, it is working too hard.
Range, Focus, Threshold, Attack, Release and Mix fine-tune it further, but Frequency, Amount and Monitor cover most voices.
Step 4: Add color and polish
Steps 1 to 3 fix problems. This step adds character: warmth, presence, a little saturation. Audacity’s built-in effects have nothing aimed at it; its Reverb is built for music, and reverb on spoken word usually sounds like a bathroom.

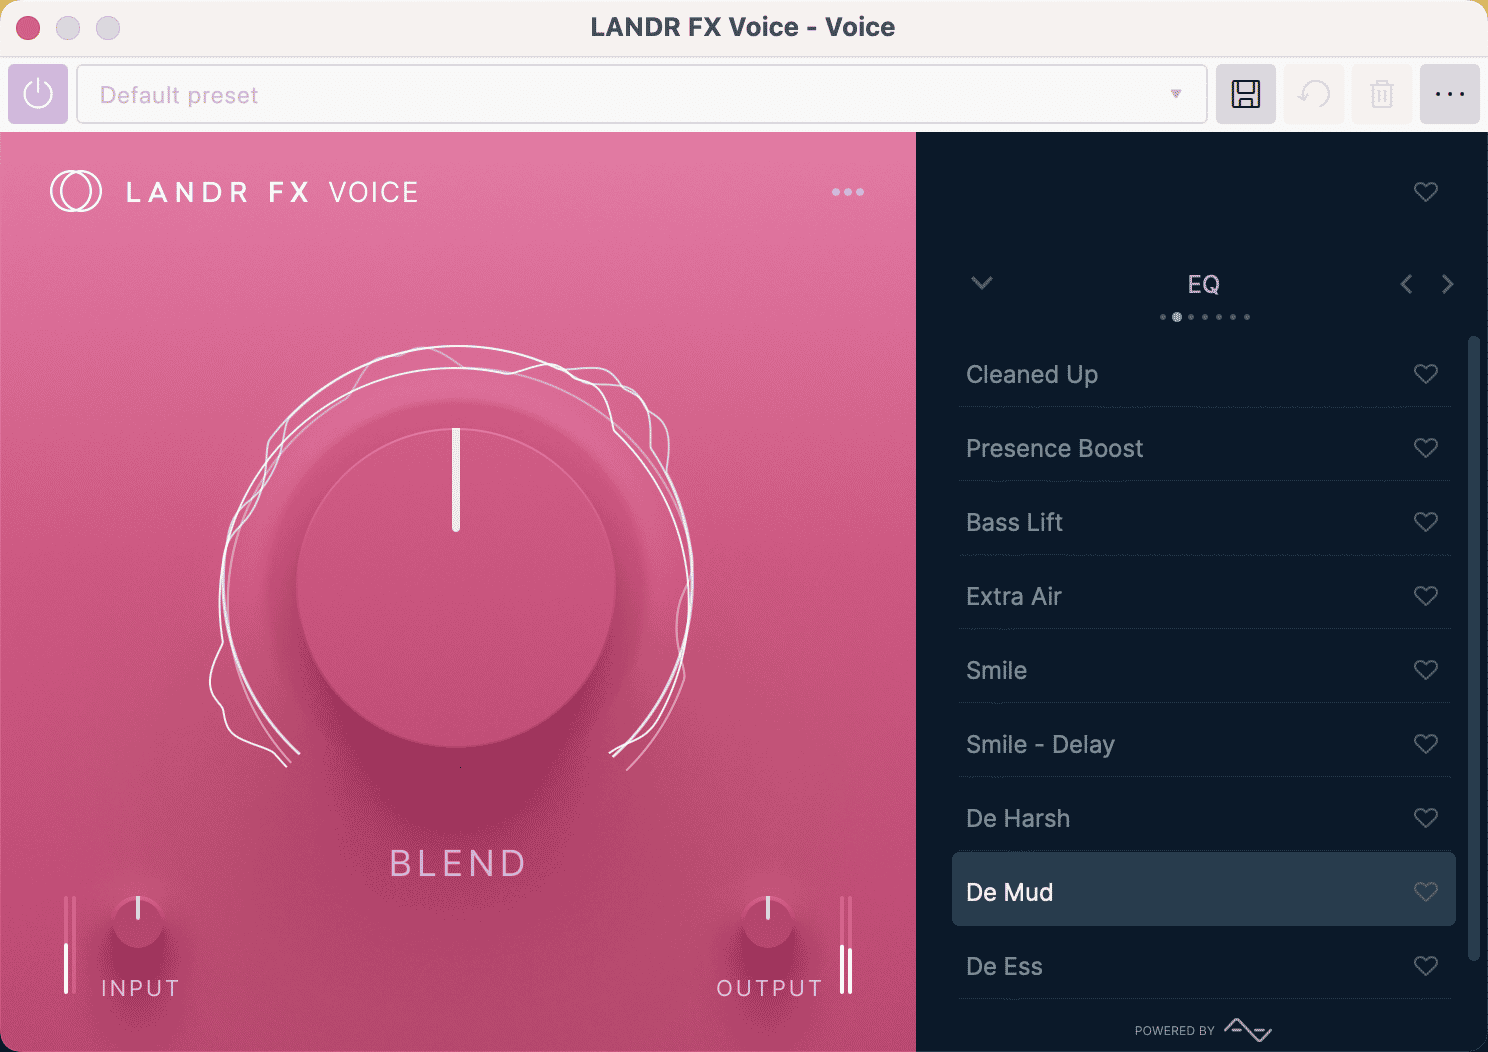
LANDR FX Voice puts a whole voice chain behind one control. Its 46 presets come in seven groups: Vocals, EQ, Reverb, Delay, Compression, Saturation and FX. The corrective ones sit in the EQ group: Cleaned Up, De Harsh, De Mud, De Ess and War On Proximity. A single BLEND dial sets how much of the preset you hear. It installs and activates through MuseHub, with no LANDR login.
- Pick a preset close to the goal. For a podcast, start with a corrective preset from the EQ group rather than a sung-vocal one. A single click applies it.
- Raise BLEND from zero. Stop when the voice sounds better, then back off one notch. Most voices need less than you think.
- Don’t double up. If the preset already de-esses or cuts mud, lighten S1 or the EQ so the two don’t fight.
Step 5: Level for publishing
- Put a Limiter on the master. In the realtime panel, scroll to Master effects, add Limiter and set its output to −1 dB. It catches the peaks that would clip after an MP3 export.
- Hit a loudness target. Apple Podcasts asks for −16 LUFS with peaks under −1 dB.
Effect ▸ Volume and compression ▸ Loudness Normalisationsets it; tick Treat mono as dual mono for a mono voice.
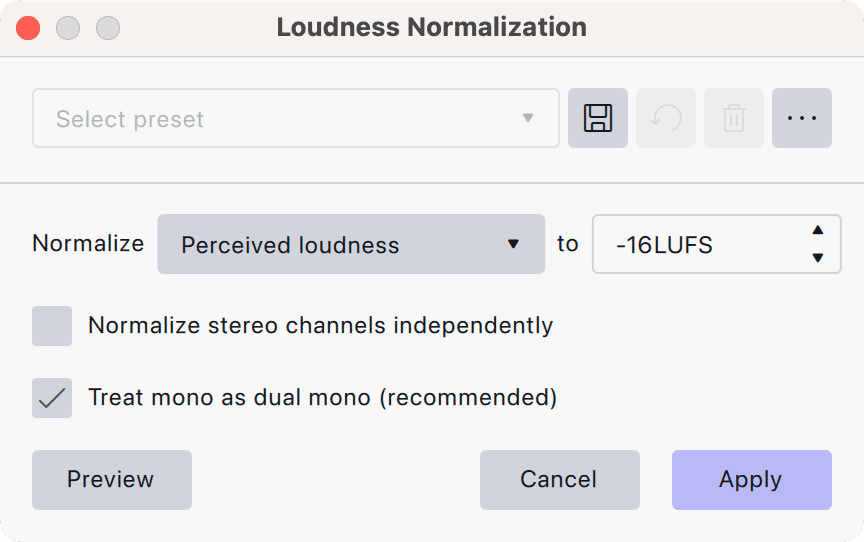
Export a WAV first, then normalize. Loudness Normalisation measures the clip without the realtime chain, so a voice normalized to −16 LUFS with the chain on comes out louder than that. Export a WAV with the chain, open it in a new project, normalize it, then export the MP3.
Prefer one window? Use Burnish Vocal Chain

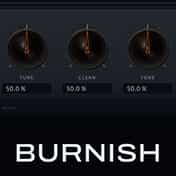
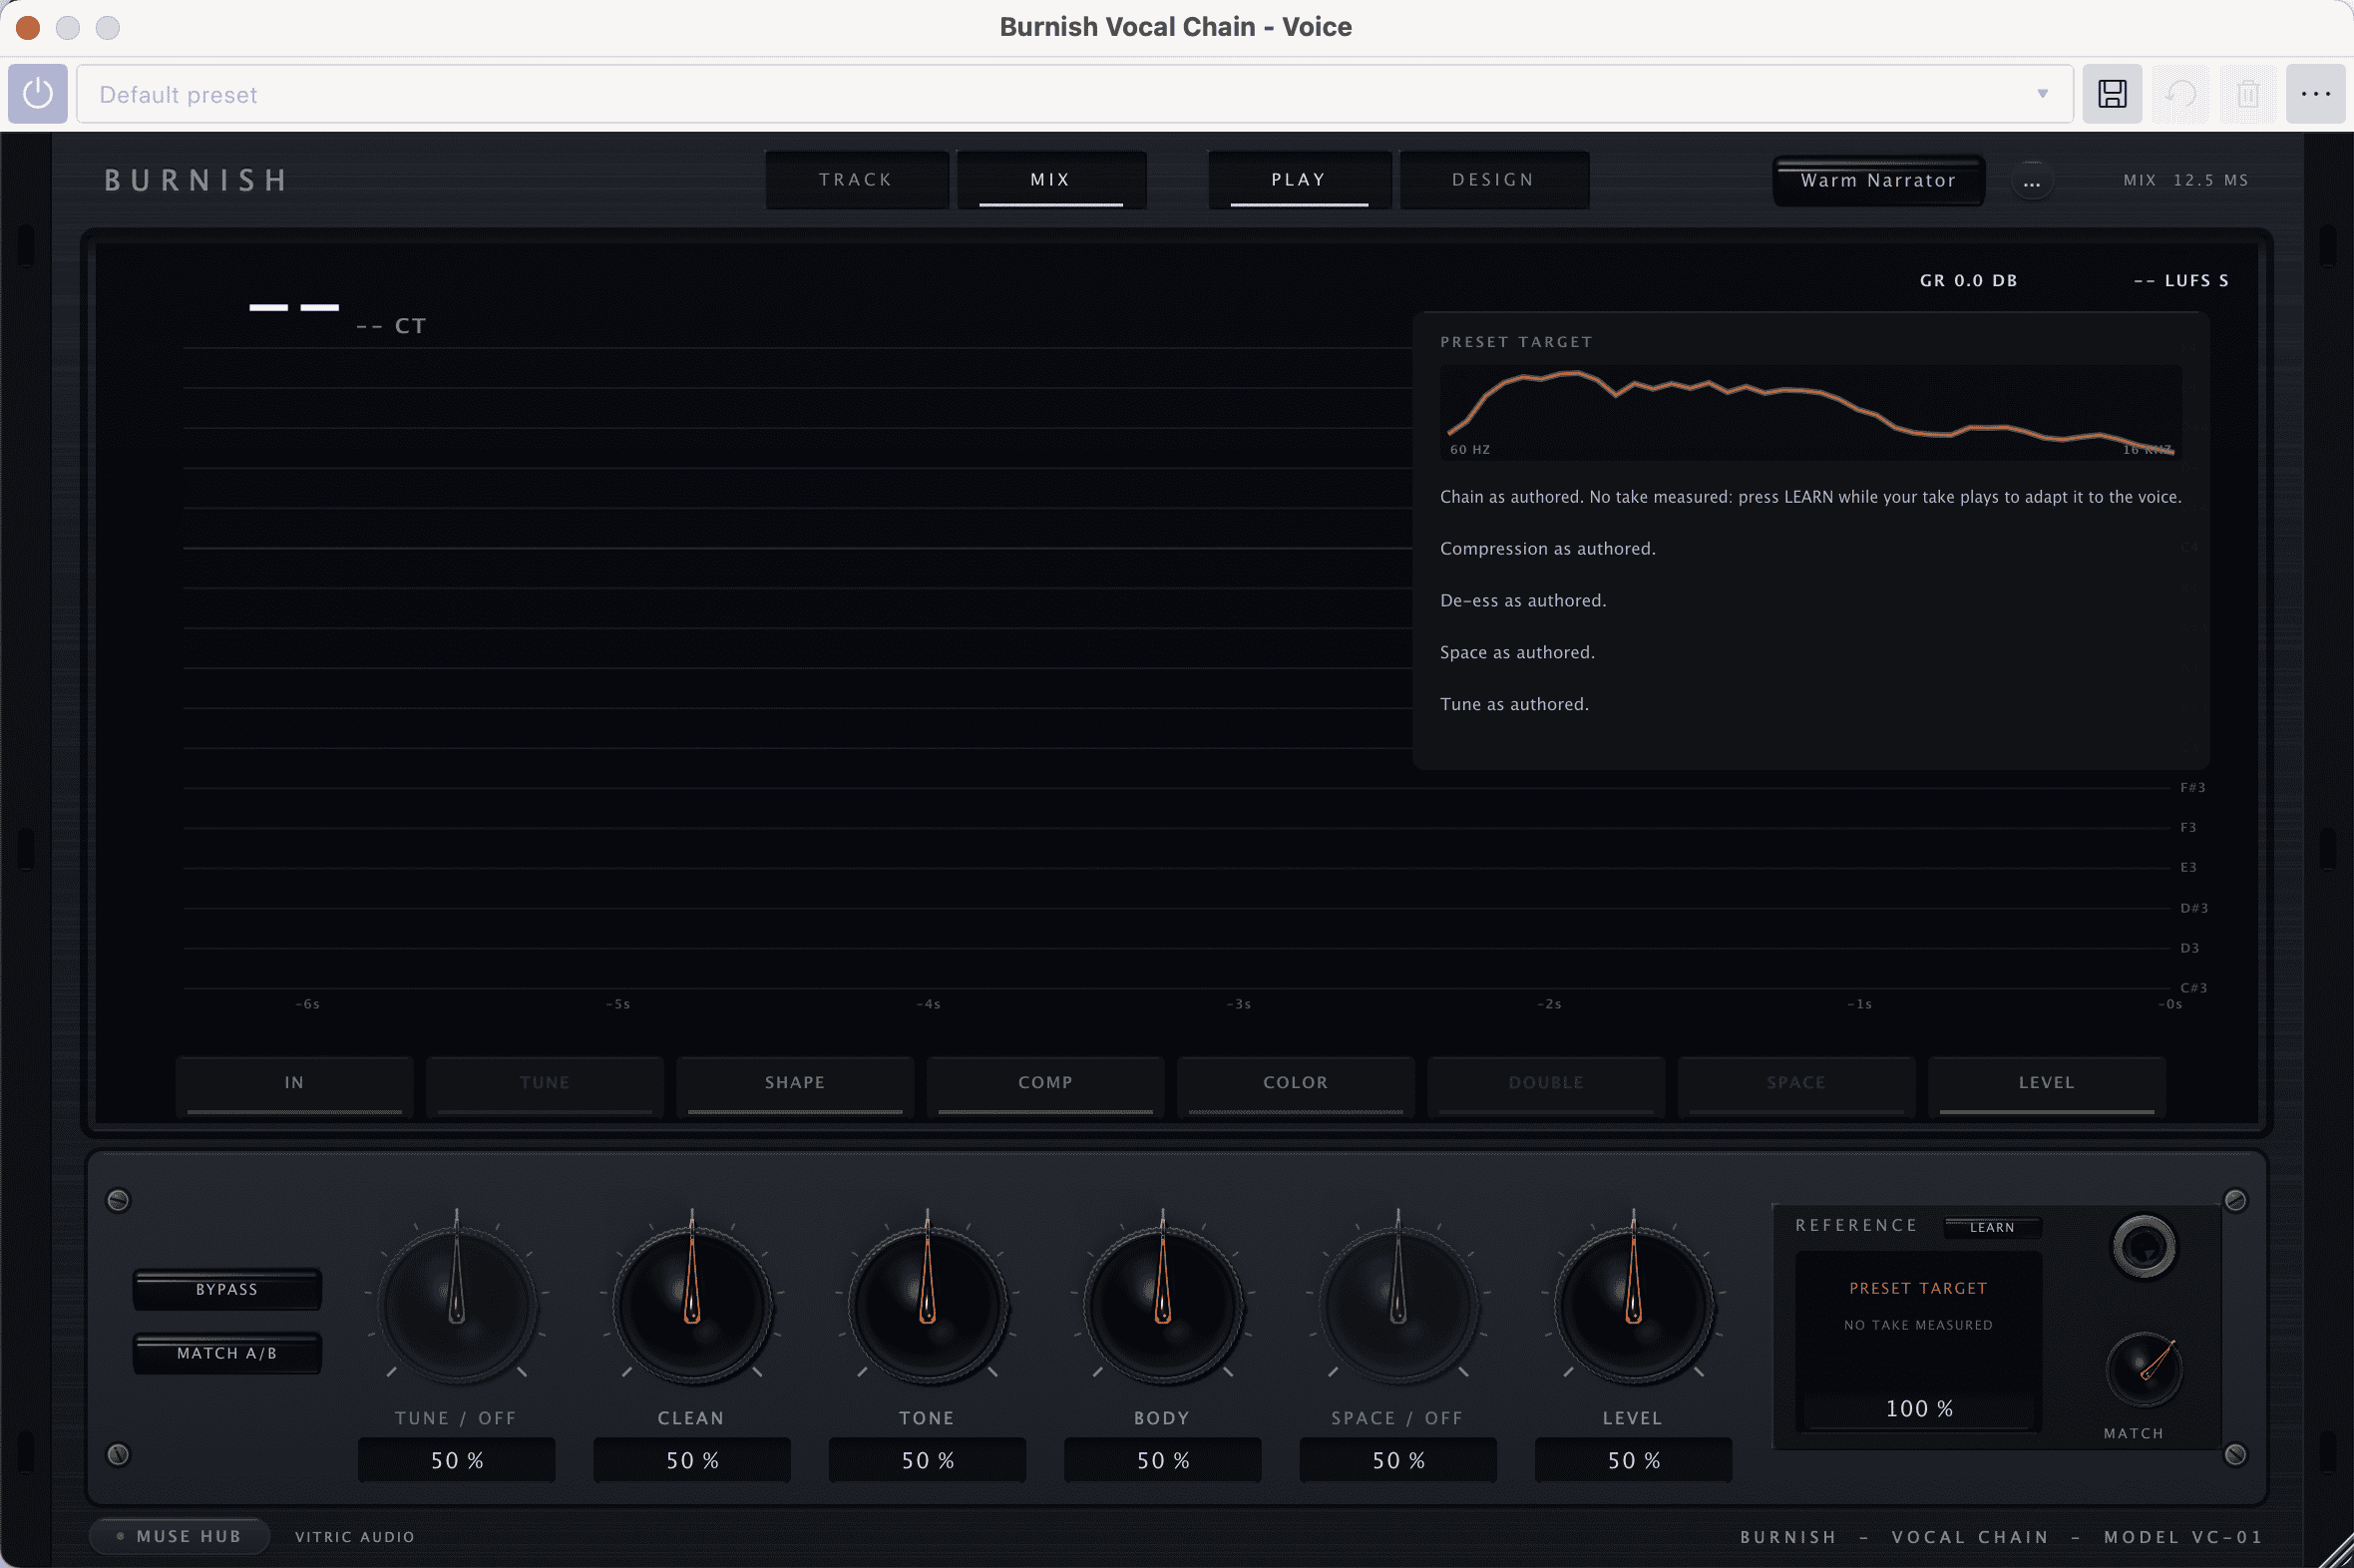
Burnish by Vitric Audio replaces steps 1 to 4 with one plugin. Its stages cover cleanup of noise and breaths, pitch correction to a key and scale, five bands of EQ and a de-esser, two compressors (one fast for peaks, one smooth for overall level), Tape, Tube or Present saturation, doubling, delay and reverb that duck under the voice, and a loudness rider with a safety limiter. MuseHub offers a 3-day free trial.
- Load the VST3 version. Click Add effect and choose
VST3 ▸ Vitric Audio ▸ Burnish Vocal Chain. - Start in the PLAY view. Six knobs, TUNE, CLEAN, TONE, BODY, SPACE and LEVEL, cover most moves.
- Start from a factory chain. There are 66. Twelve of them are Learn presets that switch on a single stage, so you can hear what each one does.
- Or match a reference. Load a song or podcast whose voice you like and Burnish suggests settings from its tone, dynamics, sibilance and space. The analysis runs on your computer; nothing is uploaded. You can also press LEARN while your own take plays to adapt a chain to your voice.
- Switch off what speech doesn’t need. Each stage can be turned off. The Warm Narrator chain already has tuning, doubling and space off.
- Pick the mode. TRACK keeps latency low while you record; MIX gives full quality for the final pass.
Keep the master Limiter from step 5 after it.
Which route to take: the free chain with S1 if you want to learn what each step does; LANDR FX Voice if you want a good result from a preset; Burnish if you want every stage in one window, or you also record singing.
Common mistakes
- Boosting before cutting. Boosts raise the noise and mud you meant to remove. Cut first.
- De-essing until the voice lisps. Use Monitor and stop when the S sounds sit level, not when they disappear.
- Compressing too hard. The voice pumps and breaths get louder. Aim for 3 to 6 dB of reduction on the loudest words.
- Reverb on spoken word. It pushes the voice away from the listener.
- Two plugins doing one job. A LANDR preset that de-esses plus S1 at full strength dulls the voice twice.
- The limiter on the track. Put it on the master, so it catches the peaks of everything you export.
- Normalizing with the chain on. Loudness Normalisation ignores realtime effects. Export a WAV first.
FAQ
Next steps
Two voices on one track? How to split speakers into separate tracks in Audacity puts each on its own track so each can get its own chain. For the rest of the workflow, see How to edit a podcast in Audacity and the best vocal plugins.
Get Audacity and the vocal plugins in one place: download MuseHub free.