How to split speakers into separate tracks in Audacity
When an interview is recorded on one microphone, or a call is saved as one file, every voice lands on the same track. You can’t turn up the quiet guest, clean up one person’s noisy room or cut one speaker’s ums without touching the other. Splitting the speakers onto their own tracks fixes that. Audacity 4 can do it by hand: duplicate the track and silence the other voice in each copy. For anything longer than a few minutes, Speaker Splitter by Pr.Germux does it automatically: it works out who speaks when and exports one file per speaker.
This guide covers the manual route in Audacity first, then the automatic one with Speaker Splitter, and ends with what to do once each voice has its own track.
Tested on Audacity 4.0.1 on macOS Sequoia. Shortcuts are written for Windows; macOS uses Cmd where Windows uses Ctrl.
Split speakers in Audacity


By hand or automatic?
| By hand in Audacity | Speaker Splitter | |
|---|---|---|
| Time | Minutes for a short clip, hours for a full episode | Set the number of speakers, choose the file, wait seconds |
| How it decides | You listen and select each passage | An AI model detects where each speaker starts and stops |
| Speakers | Any number, one duplicate track each | 1 to 10 |
| Input | Any track in the project | A WAV file, mono or stereo |
| Cost | Free | ZAR 599.99 on MuseHub |
What you need
- Audacity 4, free through MuseHub or from audacityteam.org.
- The recording, with every voice on one track.
- For the automatic route, Speaker Splitter. It installs through MuseHub as VST3 on Windows and as VST3 or Audio Unit on macOS.
Check first whether you need to split at all. If each person had their own microphone, record each to its own track next time (How to record audio in Audacity shows how). Many call apps can also save one file per person: Zoom, for example, has a setting to record a separate audio file for each participant.
Split speakers by hand
The idea: make one copy of the track per speaker, then in each copy silence everyone else. Silence, don’t delete. Deleting shifts the rest of the track and the voices fall out of sync.
- Duplicate the track. Select it and choose
Edit ▸ Duplicate(Ctrl+D), once for each extra speaker. - Name the tracks. Double-click each track name and type the speaker’s name, such as Host and Guest.
- Silence the other voice. On the Host track, select a passage where the guest talks and choose
Edit ▸ Silence audio(Ctrl+L). Work through the episode, then do the same on the Guest track for the host’s passages. - Use labels on a long recording. Press Ctrl+B at each change of speaker on a first listen, then silence from label to label.
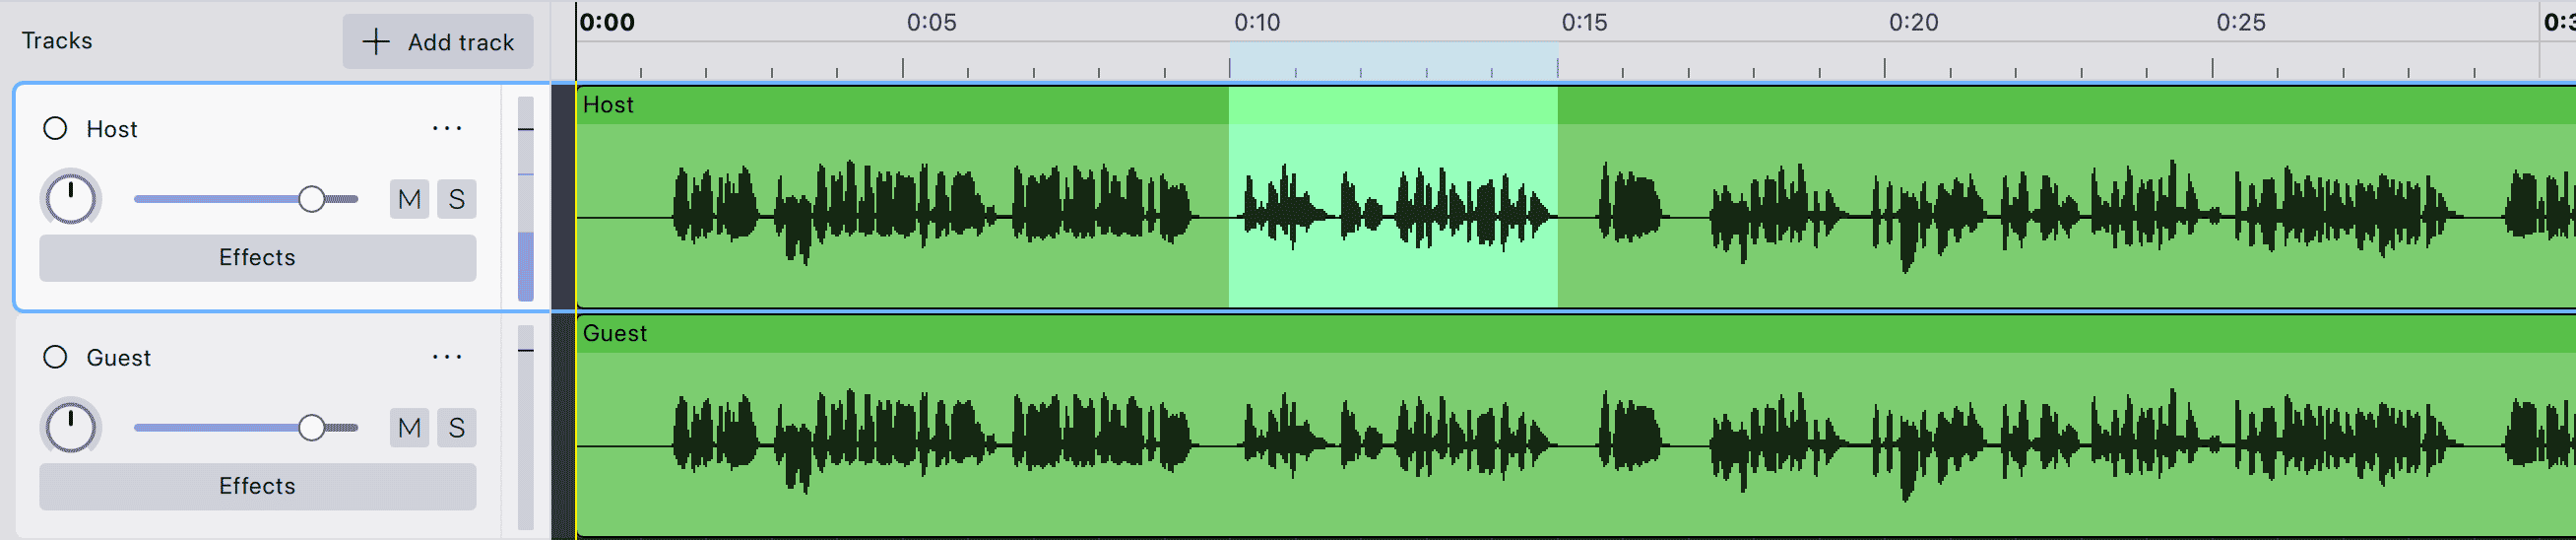
This is fine for a short clip. An hour-long conversation can mean hundreds of selections.
Split speakers automatically with Speaker Splitter
Speaker Splitter uses a small AI model that runs on your computer to detect where each speaker starts and stops, then writes one audio file per speaker. You tell it how many people are in the recording, from 1 to 10.

It works differently from most plugins: it reads a WAV file from disk instead of processing a selected track, so Audacity lists it under Generate, not Effect.
- Save the recording as WAV. If it is MP3 or another format, choose
File ▸ Export audioand pick WAV. - Open Speaker Splitter. Install it from MuseHub and restart Audacity, then choose
Generate ▸ VST3 ▸ Pr.Germux ▸ Speaker Splitter. If it isn’t listed, openGenerate ▸ Plugin managerand scan for new plugins.
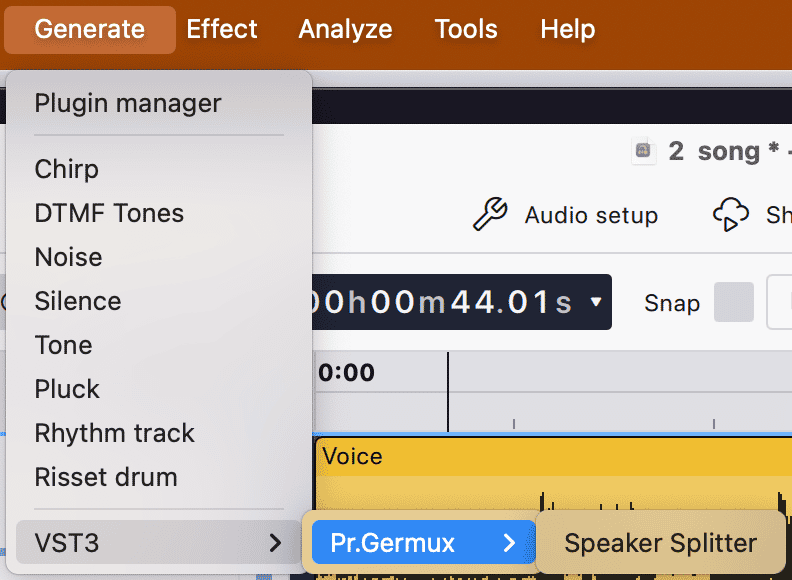
- Set the number of speakers first. Drag the Speakers slider, or type in the box next to it, to exactly the number of people talking.
- Choose the file. This starts the split. Click Browse WAV File and pick the recording. There is no separate run button: processing starts as soon as you choose the file, the progress bar fills and the status line reads “Done! Output saved next to input file.” A 1:22 two-person interview took about four seconds in our test.
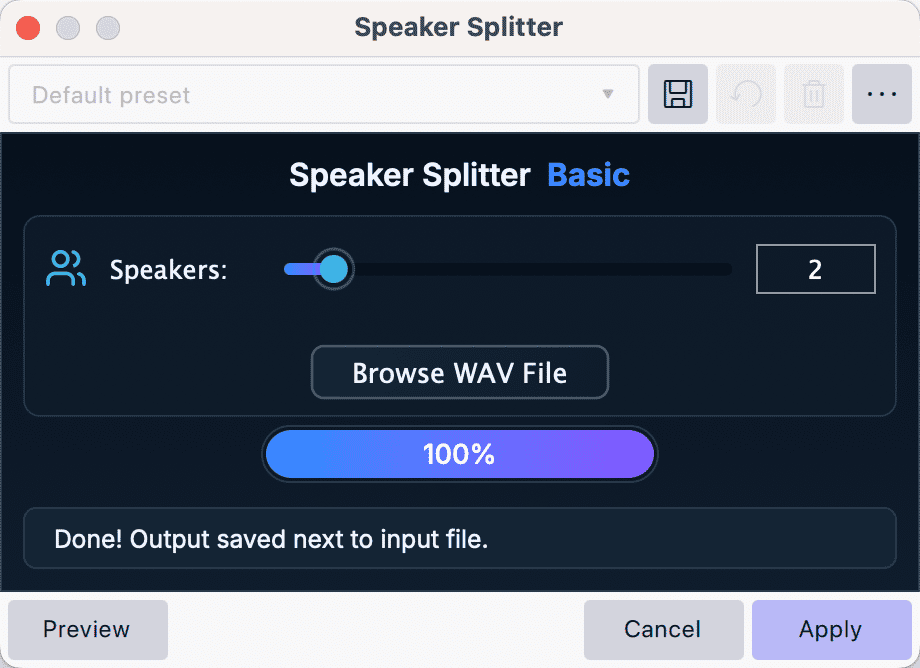
- Find the speaker files. They are saved in the same folder as the recording and named after it:
interview.wavbecomesinterview_speaker_1.wavandinterview_speaker_2.wav. Each file is full length, with silence where the other people talk, so the speakers stay in sync.

- Bring the speakers back into Audacity. Open a new project and choose
File ▸ Import ▸ Audio, selecting all the exported files. Each lands on its own track, starting at 0:00 and lined up with the original. Rename the tracks after the speakers.

What to do once each voice has its own track
- Even out the levels. Turn the quiet speaker up with the track’s gain, or bring both to the same loudness with
Effect ▸ Volume and compression ▸ Loudness Normalisation. How to make audio louder in Audacity has the targets. - Clean up only the voice that needs it. Noise reduction on the guest’s noisy room no longer dulls the host. See Audacity noise reduction.
- Give each voice its own chain. Each track has its own Effects button, so the host and guest can get different EQ, compression and de-essing. How to make your voice sound pro in Audacity builds one in the realtime panel.
- Edit, then export. Audacity mixes every track into one file on
File ▸ Export audio. How to edit a podcast in Audacity walks through the rest of the episode.
Common mistakes
- Deleting instead of silencing. The tracks drift out of sync. Silence the other voice so every track keeps its full length.
- Choosing the file before setting the speakers. Speaker Splitter starts as soon as you pick the file. Set the number of speakers first.
- The wrong number of speakers. Set too few and two voices share a file; set too many and one voice is split across two. Count the people, not the microphones.
- Similar voices. Speaker Splitter tells people apart by how they sound. Two very similar voices can end up in the same file; check both files before you edit.
- Feeding Speaker Splitter an MP3. It reads WAV. Export a WAV copy first.
- Expecting crosstalk to come apart. Speaker Splitter decides who is speaking when. Where two people talk at once, both voices are in the same stretch of audio and it can’t pull them apart, so fix those moments by hand.
FAQ
Next steps
With each voice on its own track, build each one a vocal chain, then finish the episode with How to edit a podcast in Audacity.
Get Audacity and Speaker Splitter in one place: download MuseHub free.