EQ before or after compression?
Put corrective EQ before the compressor, so it does not react to problems you are about to cut, and tonal EQ after it, to shape the finished sound. Most engineers do both, which is why the honest answer to this question is “it depends on what the EQ is doing.”
Below: why the order changes the sound, when each order wins, and a quick table for the situations you meet most.
EQ and compression tools on MuseHub



What EQ and compression each do
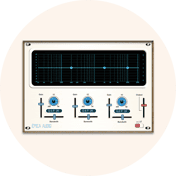
An EQ changes the balance of frequencies. It turns some bands up and others down, by the same amount all the time. A compressor changes level over time. It turns the signal down when it gets loud and leaves it alone when it is quiet. One shapes tone and the other shapes dynamics, and each changes what the other has to work with. For the basics of each, see what is audio compression and the principles of EQ.
Why the order changes the sound
A compressor reacts to level: whatever is loudest in the signal decides when it turns down. If a boomy low end or a ringing resonance is the loudest part of a vocal, the compressor spends its work on that, and the rest of the performance gets pushed around it.
So the two orders do different jobs. EQ before the compressor changes what the compressor hears. EQ after the compressor changes only what the listener hears.
When to EQ first
Cut first when the EQ removes something you do not want. A high-pass filter on rumble, a cut in the boomy low mids, a narrow notch on a harsh resonance: each of these takes away energy that would otherwise trigger gain reduction. With the problem gone, the compressor reacts to the performance itself, and it needs less gain reduction to do the same job.
When to compress first
Compress first when the EQ adds something. A boost for presence or air before a compressor feeds it more level in that band, so the compressor pushes back against the very boost you made. After the compressor, the boost stays exactly where you set it. That is why tonal shaping usually comes last in a chain.
Use EQ on both sides
The order most engineers settle on uses two EQs:
- Corrective EQ: high-pass, then cut the mud and any harsh spots.
- Compressor: even out the level.
- Tonal EQ: add presence, warmth or air to taste.
This is the same order the how to use a compressor and how to EQ vocals guides recommend. A de-esser usually sits before the compressor too, for the same reason as corrective EQ; what a de-esser is and how to use one covers it.
EQ or compressor first, by situation
| Situation | Order | Why |
|---|---|---|
| Boomy vocal or acoustic guitar | EQ cut, then compressor | The low end stops triggering gain reduction |
| A harsh ring or resonance | EQ cut, then compressor | The compressor reacts to the performance, not the ring |
| Adding presence or air | Compressor, then EQ boost | The boost stays where you set it |
| Both problems and tone to shape | EQ cut, compressor, EQ boost | Each EQ does the job it suits |
Whatever the table says, judge the result by ear. Bypass the chain at matched loudness and compare, because a louder version always sounds better at first.
Mistakes to avoid
- Boosting before the compressor, then wondering where the boost went. The compressor turned it back down.
- Fixing a problem with a boost after the compressor when it needed a cut before it. A muddy vocal gets clearer by removing the mud, not by adding treble on top.
- Comparing at different volumes. Match the level of the processed and bypassed sound before you decide which order wins.
Tools to try

MuseFX is a free set of mix effects from Muse Group that includes EQs and a compressor, so you can try both orders without buying anything.

Trinity EQ is a surgical EQ with an analyzer, which makes it easy to find the exact frequency to cut before the compressor.

OPT4 by NIVIEM is a free optical-style leveler, the gentle kind of compressor that suits vocals. For more options, see the best compressor plugins.
FAQ
Next steps
For the controls behind both processors, see how to use a compressor, and for the whole vocal chain, mixing vocals.
Get MuseFX free, and the rest of your mixing tools in one place — download MuseHub free.