Audacity equalizer: how to EQ audio in Audacity 4
To EQ audio in Audacity 4, select the audio and choose Effect ▸ EQ and filters. Filter Curve EQ lets you draw your own curve, Graphic EQ gives you sliders at fixed frequencies, and Bass and Treble is the quick option with one knob for each. For rumble under a voice, High-pass filter is the one-step fix.
This guide covers all seven EQ and filter tools in Audacity 4, the settings to start with for voice and music, and when a plugin EQ is the better choice.
Tested on Audacity 4.0.2 on macOS. Shortcuts are written for Mac; Windows uses Ctrl where Mac uses Cmd.
EQ tools for Audacity on MuseHub


What an equalizer does
An equalizer, or EQ, turns frequency ranges up or down. Low frequencies are rumble and weight, the middle is body and clarity, and the top is presence and air. Cutting what gets in the way usually helps more than boosting what you want. For the basics, see the principles of EQ.
The EQ and filter tools in Audacity 4
All seven live in Effect ▸ EQ and filters, and each opens a window with a Preview button, so you can listen before you apply.
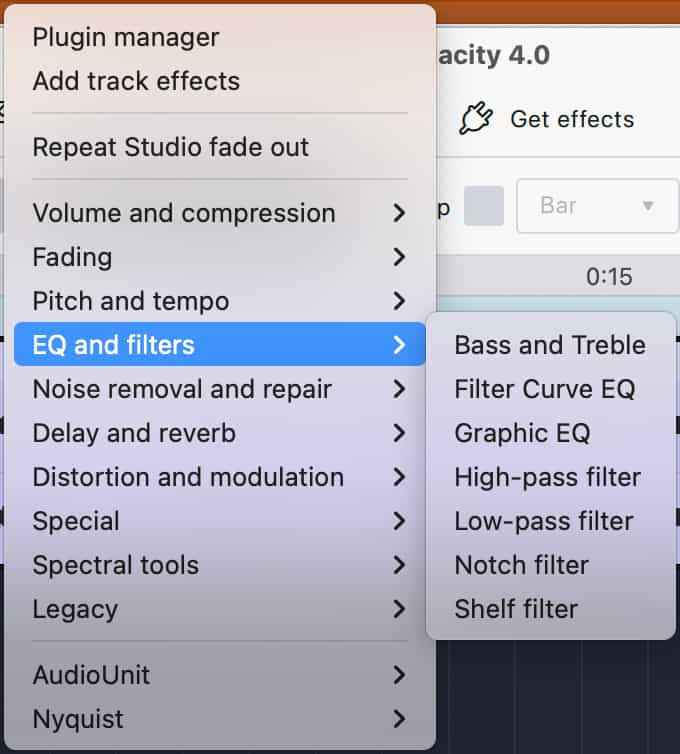
| Tool | Main controls | Use it for |
|---|---|---|
| Bass and Treble | Bass, Treble and Output volume knobs | Quick tone changes |
| Filter Curve EQ | A curve you draw from 20 Hz to 22 kHz | Precise cuts and boosts |
| Graphic EQ | 31 sliders from 20 Hz to 20 kHz, ±24 dB | Shaping by frequency band |
| High-pass filter | Frequency, Roll-off (dB per octave) | Rumble under a voice |
| Low-pass filter | Frequency, Roll-off (dB per octave) | Hiss, or a muffled effect |
| Notch filter | Frequency, Q | One narrow problem, such as mains hum |
| Shelf filter | Filter type, Frequency, Amount | Turning all lows or all highs up or down |
The high-pass, low-pass and shelf filters all open at 1000 Hz, so always set the frequency before you apply them. The notch filter opens at 60 Hz, the frequency of mains hum in North America; in Europe it is 50 Hz.
How to EQ a voice in Audacity, step by step
- Select the voice you want to change (Cmd+A for everything).
- Remove the rumble. Choose Effect ▸ EQ and filters ▸ High-pass filter, set Frequency (Hz) to about 80 and click Apply.
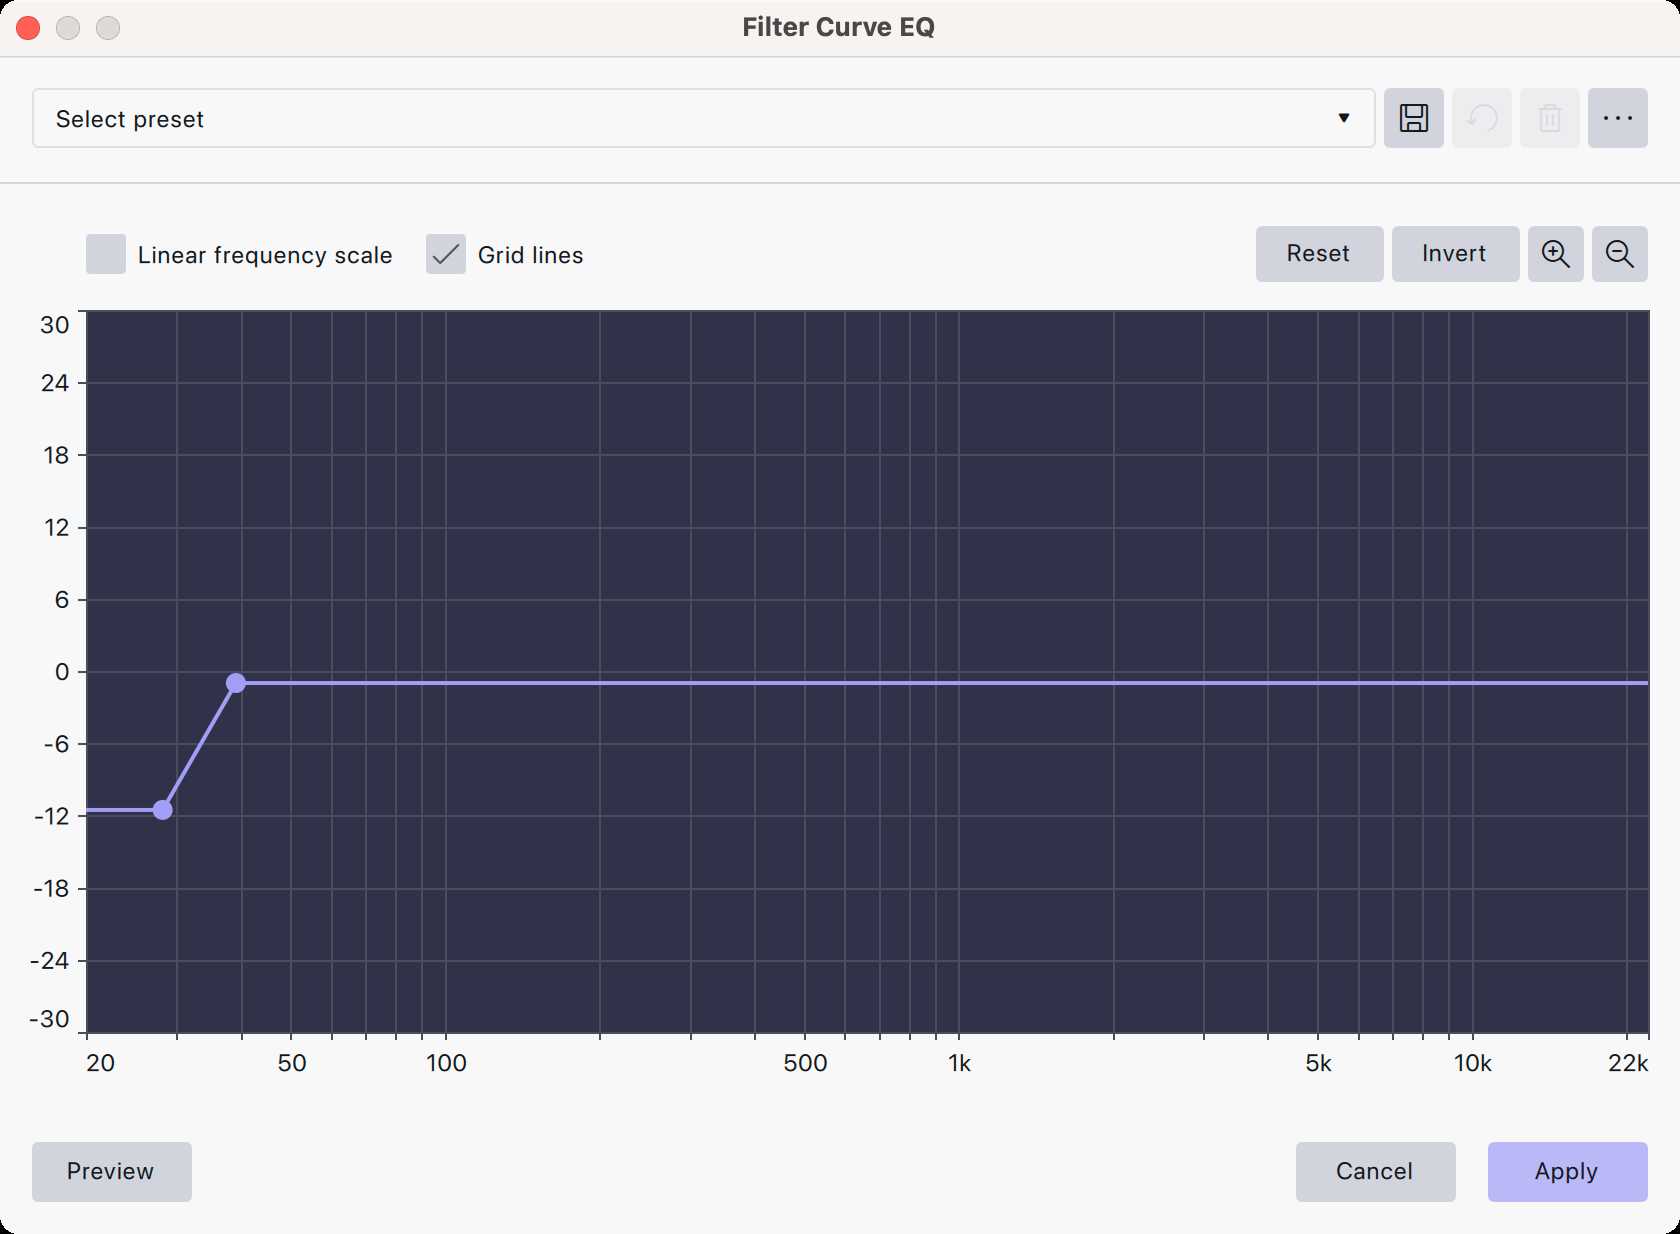
- Open Effect ▸ EQ and filters ▸ Filter Curve EQ. The flat line across the graph is your audio unchanged.
- Cut the mud. Click the line to add a point, and drag it down a few dB somewhere between 200 and 500 Hz if the voice sounds thick or boxy.
- Add presence, gently. Add a point around 3 to 5 kHz and raise it a couple of dB so the words cut through.
- Click Preview, then Apply. Reset returns the line to flat if you want to start again.
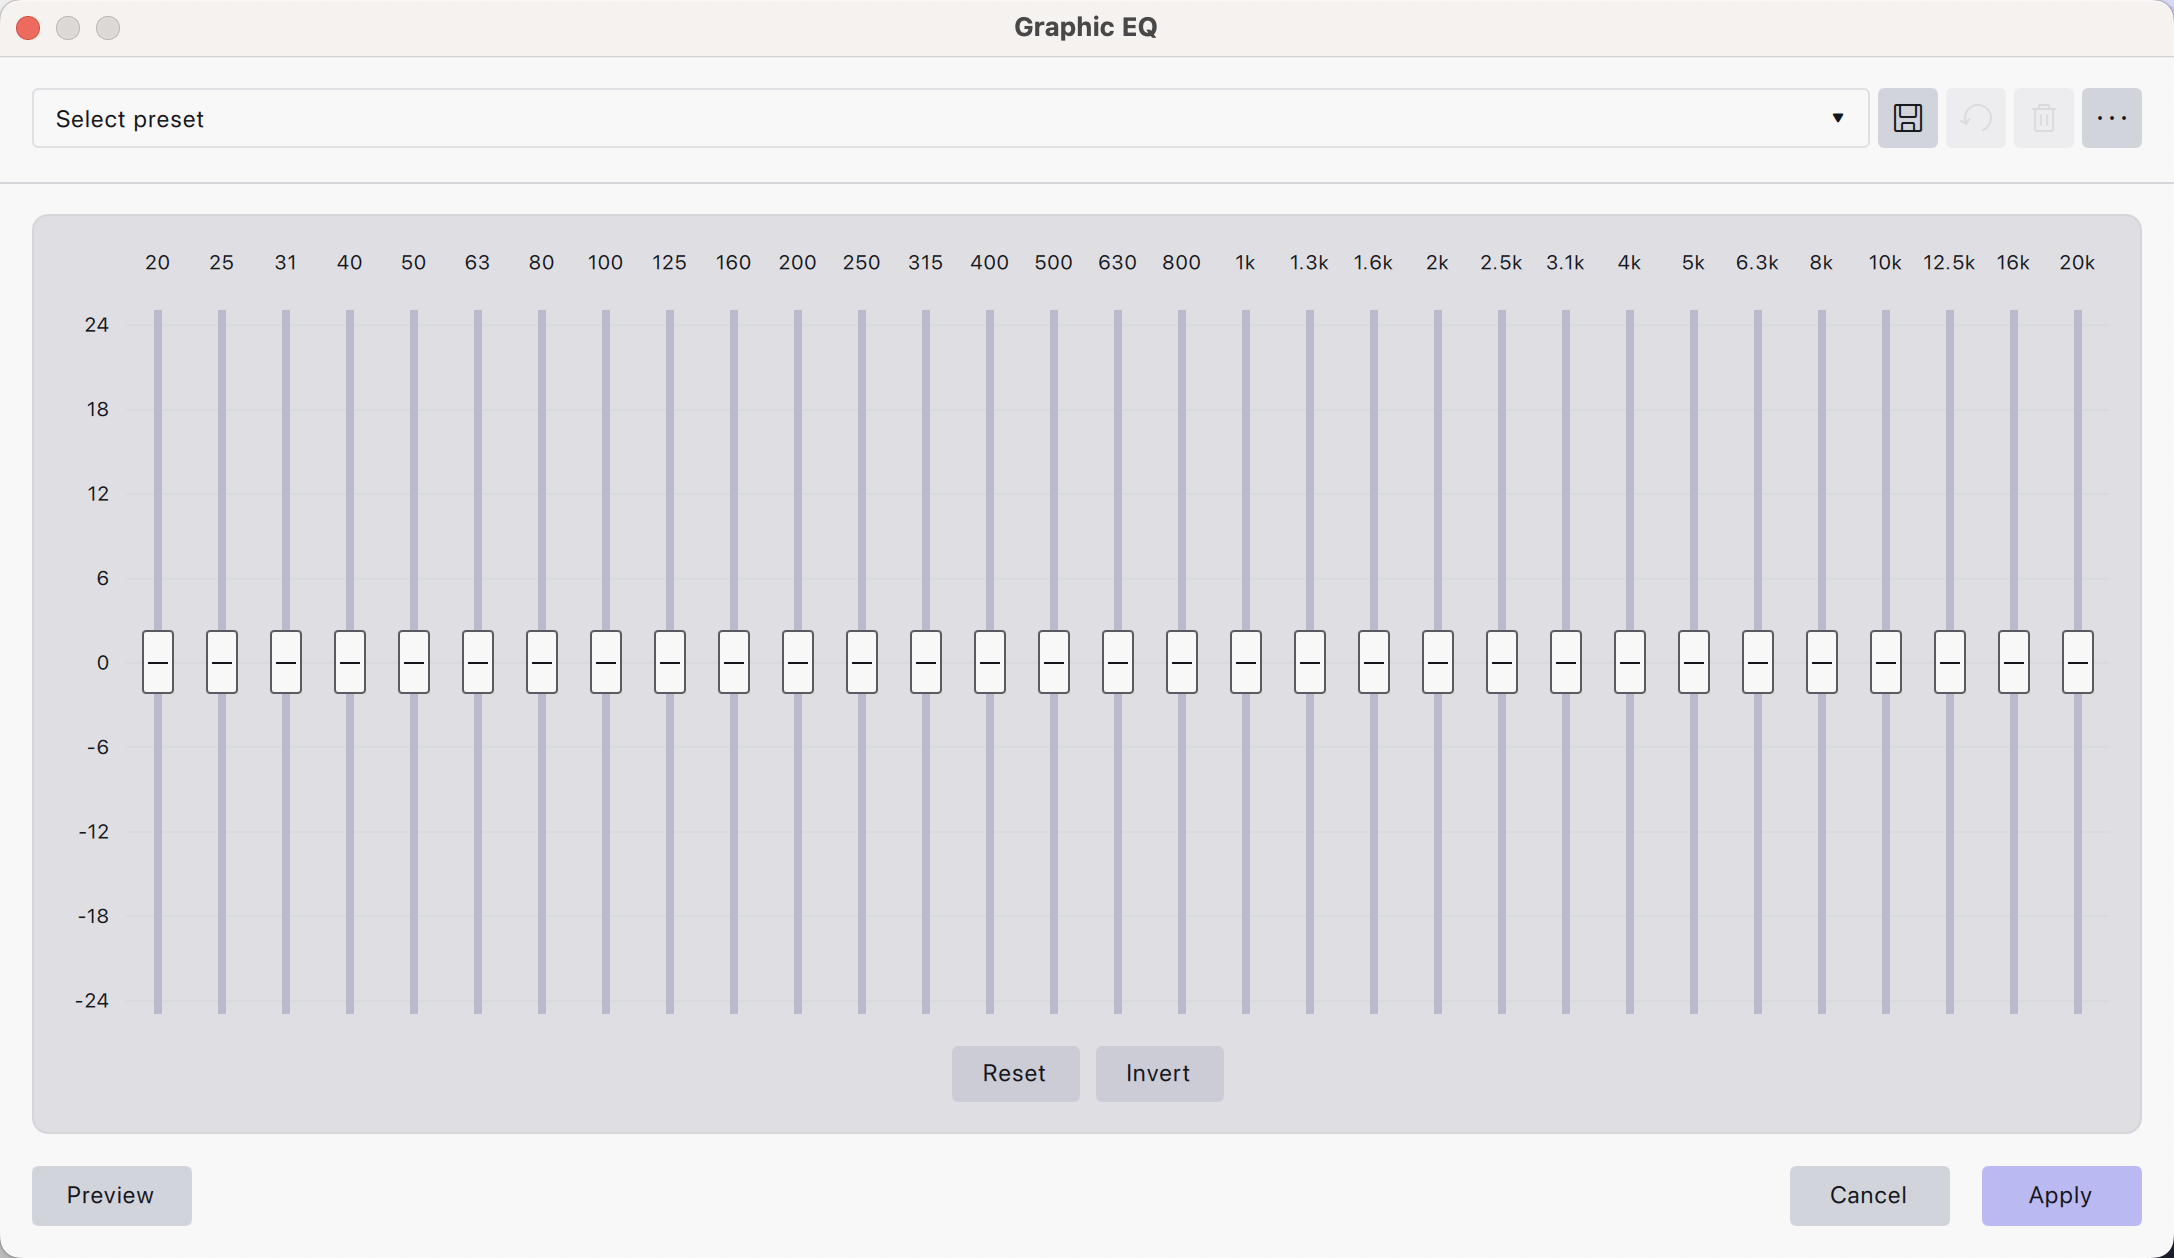
Graphic EQ and Bass and Treble
Graphic EQ has 31 sliders, one per frequency band from 20 Hz to 20 kHz, each moving up to 24 dB up or down. It is the easier tool when you know which band to change and want to see it at a glance. Reset sets every slider back to 0, and Invert flips them.
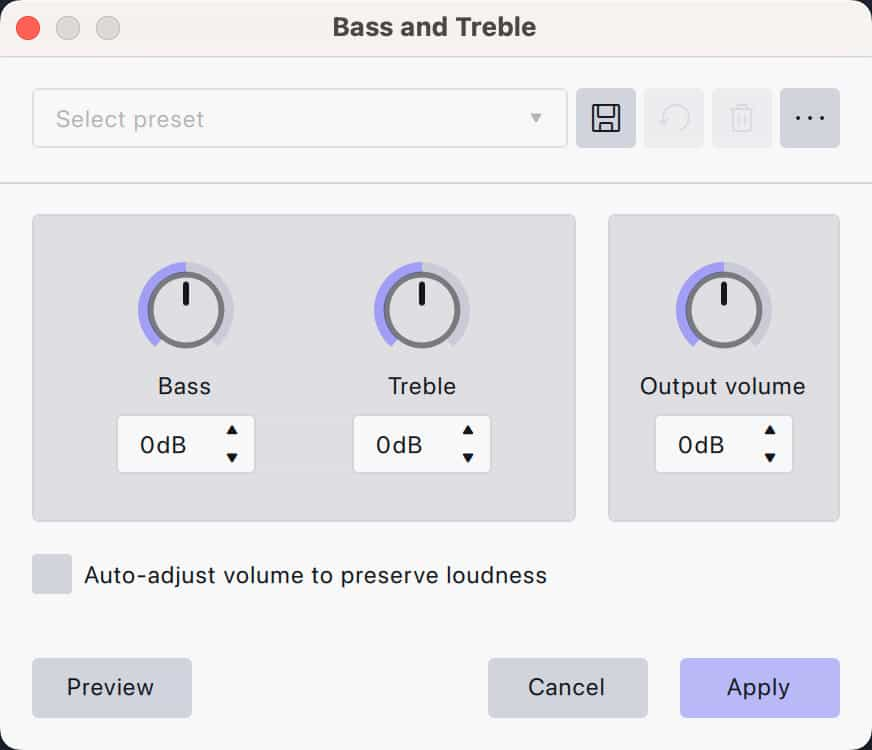
Bass and Treble has three knobs, Bass, Treble and Output volume, and an Auto-adjust volume to preserve loudness option, so a boost does not simply make the track louder. It is the quickest way to warm up or brighten a whole recording.
Starting settings for common jobs
| Job | Move | Frequency |
|---|---|---|
| Rumble under a voice | High-pass | About 80 Hz |
| Mains hum | Notch | 50 or 60 Hz |
| Muddy or boxy voice | Cut, a few dB | 200 to 500 Hz |
| Harsh voice | Gentle cut | 2 to 5 kHz |
| More clarity | Small boost | 3 to 5 kHz |
| More air | Small high shelf | Above 10 kHz |
These match the ranges in how to EQ vocals. Treat them as starting points and sweep to find your own voice’s spots.
Built-in EQ or a plugin?
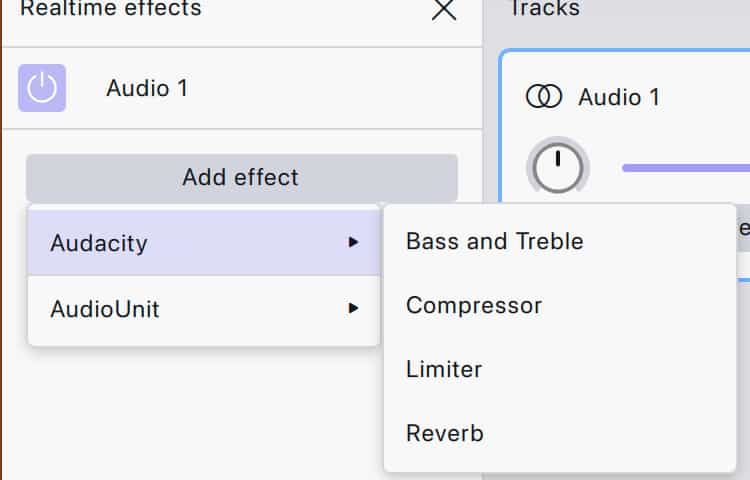
The tools in Effect ▸ EQ and filters change the audio when you apply them. To hear EQ while you work and change it later, add it as a realtime effect: press E, click Add effect and choose it. Of the built-in EQs, only Bass and Treble is available there, next to Compressor, Limiter and Reverb. For a full realtime EQ, use a plugin.

MuseFX is a free set of mix effects from Muse Group that includes EQs and runs as a realtime effect in Audacity.

Trinity EQ is a surgical EQ with an analyzer, which makes it easy to find the exact frequency to cut.
Common mistakes
- Applying a filter at its default. High-pass at 1000 Hz thins a voice badly. Set the frequency first.
- Boosting instead of cutting. Cut the problem first; boosts are easy to overdo.
- Forgetting the order. EQ that removes problems usually goes before compression; see EQ before or after compression?.
FAQ
Next steps
For the whole voice chain, see how to edit a podcast in Audacity and how to make your voice sound pro in Audacity. Get Audacity and MuseFX free in one place — download MuseHub free.