How to master a song: the chain, step by step
To master a song, import the final stereo mix with a few decibels of headroom, set its loudest peak to around −3 to −6 dB, then work through a chain of gain, gentle EQ, light compression and a limiter while checking a loudness meter and a level-matched reference track.
That order is not arbitrary. Each stage assumes the one before it has been done, and most home-mastering problems come from working out of sequence — reaching for the limiter first, then trying to EQ a signal that is already squashed.
New to the stage itself? What is mastering covers what it is for before you start turning knobs.
A starter mastering chain

The chain at a glance:
- Gain — set the level going into everything else.
- EQ — broad, gentle tonal correction.
- Compressor — light glue, a decibel or two.
- Limiter — the ceiling and the final loudness.
- Meter — watching the whole way.
How we choose: we give the order and what to watch at each stage, and we say where the honest answer is “send it back to the mix”.
Before you start: what a master-ready mix looks like
The single most useful thing you can do for your master happens before mastering: leave headroom.
Headroom is the space between the highest peak of your audio and 0 dBFS, the digital maximum. Leaving it while mixing keeps the dynamics and transients of the audio unimpaired, and at the mastering stage it gives you the flexibility to adjust EQ without pushing the audio too hard into the plugins that follow. A mix bounced right up against 0 dB leaves you nowhere to work.
Export your mix as a single stereo file, at the project’s native sample rate and a high bit depth, with no limiter on the master bus. If you have been mixing into a limiter, take it off and re-export — you are about to add a better one, and two in series is one too many.
Then take a break. A day if you can. You cannot judge tonal balance on a track you have been inside for six hours; this matters more than any plugin choice on this page.
What to send back to the mix instead
Some problems are not mastering problems, and recognising them saves hours:
- The vocal is too quiet or too loud against the band.
- One instrument dominates a frequency range.
- A part is distorted or clipped at source.
- The low end is loose or the kick and bass are fighting.
All of these are fixable in the mix in minutes, and effectively unfixable across a stereo file. Go back.
Step 1 — Set your session up and get your gain right
Import the mix into a fresh project. Add a metering plugin first, at the end of the chain, so you can see what you are doing the whole way through.
Now set the input level. Preview the loudest section of the mix — the last chorus, usually — and use a gain plugin to set the peak of the audio to somewhere between −3 dB and −6 dB on your peak meter.
This is not cosmetic. Most analogue-modelled plugins behave differently depending on how hard you drive them, and starting from a known level means the settings you choose are repeatable. It also leaves the room the EQ stage needs.
Step 2 — EQ, gently
Mastering EQ is broad and small. You are correcting the balance of the whole record, and every move affects every element at once.
Work in wide, shallow moves. A fraction of a decibel across a broad range is a mastering move. Several decibels in a narrow band is a mixing move that belongs upstream.
Cut before you boost. If the track feels boomy, a gentle reduction in the low-mids usually beats boosting the top to compensate — boosting adds level and pushes the later stages harder.
Check the extremes. A high-pass filter very low down can clear subsonic rumble that is eating headroom without contributing anything audible. At the other end, a slight lift can add air, but it also emphasises sibilance and cymbals, so listen for both.
Sanity-check in mono. Anything that vanishes or turns strange in mono is a phase issue in the mix, not something to EQ around.
If you want the underlying principles, principles of equalization covers them.
Step 3 — Compression, lightly
Mastering compression is not the same job as mixing compression. Here you are gluing an already-balanced mix, not shaping a performance.
Aim for one or two decibels of gain reduction, not the several you might use on a vocal. Ratios stay low — around 1.5:1 to 2:1. Attack is usually slow enough to let transients through, and release slow, or set to auto.
Listen for the mix moving together rather than for individual elements changing. Good bus compression makes the parts feel like one performance. Too much makes the whole track duck and breathe around the drums.
Bypass frequently, at matched level. If you cannot hear a clear improvement, use less. How to use a compressor covers the controls in depth.
Step 4 — Saturation and stereo, optionally
Two optional stages that live between compression and limiting.
Saturation adds harmonic content, which reads as density and warmth and can make a track feel louder without raising its peak level. Subtle amounts only. See what is saturation.
Stereo enhancement widens the image. Use sparingly, and always check mono afterwards — width achieved by phase tricks can collapse into a thinner, weaker mono sum, which matters because plenty of playback is still mono.
Step 5 — Limiting
The limiter sets the ceiling and does most of the loudness work. It goes last, because anything after it can push peaks back above the ceiling you just set.
Set the ceiling just below the maximum for your delivery format, leaving a little room so that conversion to a lossy format cannot push peaks over.
Then push the input until you reach the loudness you want, watching the gain reduction. And here is the part that separates a good master from a loud one: bypass, match levels, and compare. Turn your monitoring down until the limited and unlimited versions sound equally loud, then A/B. If the limited version still sounds better, you are in good shape. If it sounds flatter and less exciting, you have gone too far.
Louder always wins an unmatched comparison. That single bias is responsible for more over-limited masters than any other cause.
What is a limiter covers the mechanism and controls.
Step 6 — Reference tracks, used properly
Pick two or three commercially released tracks in a similar style and compare against them throughout.
The rule that makes references useful: match the levels. Import the reference into your session and turn it down to your track’s loudness, or turn yours up to match. Comparing your quiet work-in-progress against a loud master tells you only that the master is louder.
With levels matched, listen for tonal balance rather than loudness. Is your low end bigger or smaller? Is your top end harsher? Does your track feel narrower? Those are the questions references answer well.
Listen on more than one system. Your monitors, headphones, a phone speaker, a car. A master that survives all four is done.
The chain, summarised
| Stage | What it does | What to watch | Typical move |
|---|---|---|---|
| Gain | Sets level into the chain | Peak meter | Peaks to −3 to −6 dB |
| EQ | Corrects overall tone | Broad balance, mono check | Fractions of a dB, wide |
| Compressor | Glues the mix | Gain reduction meter | 1–2 dB, ratio ~2:1 |
| Saturation | Adds density | Ears, not meters | Subtle |
| Stereo | Adjusts width | Mono compatibility | Small, checked in mono |
| Limiter | Ceiling and loudness | Gain reduction, transients | Push, then A/B matched |
| Meter | Tells you where you are | Peak and loudness | Watching throughout |
Step 7 — Final checks and export
Top and tail. Trim silence at the start and end, and add short fades so there is no click.
Listen all the way through, once, without touching anything. This is where you catch the click at 2:14 that you have been editing past all afternoon.
Check mono one last time.
Export at the sample rate and format your distributor asks for, keeping a high-resolution master archived even if you also make MP3s. If it is a release with several songs, master them in one session and check the transitions between them — consistency across the record is a large part of the job.
How loud should it be?
The honest answer is that this depends on where the track is going, and the guidance moves.
Streaming platforms normalise playback loudness, which means a track mastered far louder than the rest is turned down on playback — you paid for the extra loudness in flattened transients and got nothing back. Rather than chasing a number from an article, check the current guidance for the platforms you release on, and use your level-matched references as the practical test.
The reliable rule: as loud as the material tolerates without losing what makes it exciting, and no louder.
Tools
A workable chain, with prices as they stand:

Trinity EQ by Épica Audio — $49.99.

Aesthe by Cloudy Samples — $9.99.

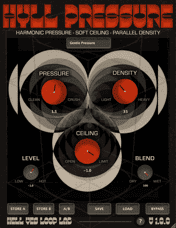
HYLL Pressure — free, a sensible first limiter.
For more options see the best mastering plugins and the best limiter plugins.
FAQ
How much headroom should I leave in the mix? Enough that the loudest peak sits a few decibels below 0 dBFS — around −3 to −6 dB is the working range.
Can I master in the same project as the mix? Better not to. A fresh project with just the bounced stereo file stops you fiddling with the mix and forces you to judge the finished thing.
Do I need expensive plugins? No. A capable EQ, compressor and limiter cover it, and good free options exist. Your room and your ears limit you long before your plugins do.
How long should mastering take? Less time than you expect, on a mix that is ready. If you have been at it for hours, the problem is usually in the mix.
Should I master each song of an EP separately? Master them individually but in one session, checking level and tone consistency across the whole record.
Is automated mastering any good? It is fast and cheap and has improved a lot. It cannot ask what you were going for, and it will process a mix that needed fixing instead. Useful for demos; consider real ears for a release.
Next steps
What is mastering covers the stage conceptually, including what it can and cannot fix. The processing stages each have a guide: how to use a compressor, principles of equalization, what is a limiter and what is saturation.
If the answer turned out to be “fix the mix first”, how to mix music yourself is the place to go.
Get a full mastering chain in one place — download MuseHub free.